


A Beginners Guide to Autofocus
Autofocusing: What it is? How to use it? When to use it?
For amateur photographers, and all photographers alike really, acquiring focus can be the trickiest part of capturing an image. How best do we go about making sure the most important objects within our image are in focus and stay there? You can, of course, change your focus setting from AF (autofocus) to MF (manual focus), but this requires experience and time; autofocus can offer similar results without the added fuss.
It may be helpful to break autofocus down for a more manageable discussion. The AF feature is commonly thought of as a simple feature; turn it on, the camera finds focus and then you snap your photo. For first time photographers, this can be misleading and doesn't cover the finer points of how to use different modes and how to better set up the feature on your camera for use in different scenarios. Through a thorough understanding of AF, we can improve our grasp on photography, our cameras and how to use it to create thoughtfully composed images.
Autofocus explained: the different types of autofocus
On a modern camera, your camera will have different autofocus points that you have the options to scroll through manually before taking a photograph (while viewing the image in front of you).
There are two places on the camera that allow you to view your image when autofocus is on. The first is within the viewfinder. Alternatively, you can look at the focused parts of the image on the LCD screen in live view mode.
Live view mode allows the photographer to see on the LCD display what they will be photographing. Most modern digital cameras and DSLRs will have a display on which to view your composition but not all will have a viewfinder, the viewfinder being what you look through when you hold the camera up t your eye.
Depending on the camera you may have several or up to hundreds of autofocus points.
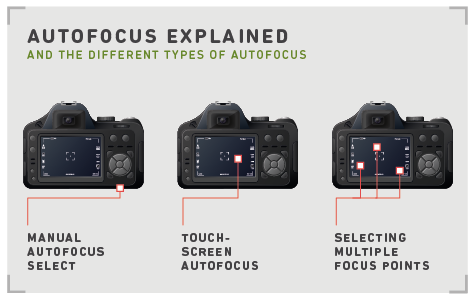
Autofocus in three modes:
- Manual Autofocus Select: You can manually select an area to focus within the image from a range of options that the camera provides; this feature is usually provided as a scroll, and you can select from a range of focus points that the camera designates.
- Touchscreen Autofocus: With your cameras LCD monitor you are be able to manually select what part of the image you’d like to focus on by touching the screen.
- Selecting Multiple Focus Points: On some DSLRs, you can focus on many parts of the image in both the foreground and background. The focus isn’t lost on any particular object within the image. This is useful if you’re taking a photograph with a shallow depth of field.
When you might use specific autofocus features
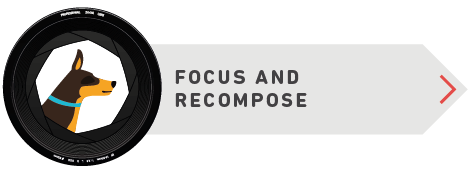
Many beginners start with a technique called ‘focus and recompose’. This method is generally associated with portrait photography, and is typically used when the depth-of-field is fairly shallow.
In portrait photography we focus on the eyes. What you will do is lock focus on the eye by setting your camera to Single Servo or AF-S. When in this setting your camera will acquire focus once the shutter release button is pressed halfway. You may then recompose the shot while maintaining focus on your subject.

This is useful is you want to compose a shot and add some visual interest by not shooting your subject directly in the centre of the frame. For example: acquire focus on your subject using the centre AF point half-pressing the shutter button, lock focus by keeping the button half-pressed and shift your frame by angling your camera to the right so your subject is now appears on the left of the centre autofocus point then finish the action of pressing the shutter button to capture your image.
When using this technique maintain your body position to avoid or blurring the image. You will find that as you become more experienced, you will move away from this method and use Back Button Focusing, which will be explained in more depth later.
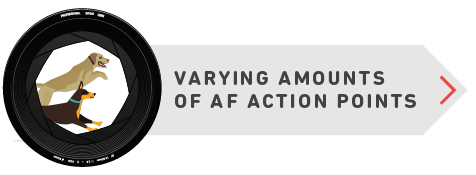
The amount of action within the shot may dictate how many autofocus points you use.
For example if you’re attempting to photograph a moving object, like a dog running, then you may want to use continuous autofocus This focus mode will take advantage of the full array of AF points to track your subject as it moves within the frame and maintain focus while the shutter button is half-pressed. This is also where live view mode can be most effective, when photographing action.
Shooting still images and subjects that are less animated, such as a portrait or landscape photography, may require the photographer to utilize less of a camera’s AF points.
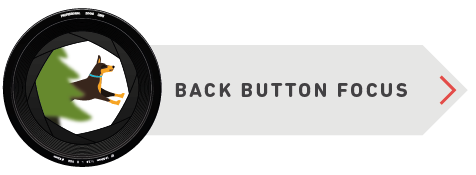
This method is often used when photographers want to move away from the ‘focus and recompose’ method. This method stops the camera autofocusing when the shutter button is pressed halfway down, and reassigns this function to another button, usually on the back of the camera.
This technique replaces focus and recompose; it is more reliable and allows the shot to be recomposed an infinite amount of times without having the need to reacquire focus for every new shot because the AF function is linked to the same button as the shutter, meaning once you release the shutter you also release the autofocus lock.

For instance, if you were photographing animals you can lock focus on them, but then trees appear in the foreground of your shot, the camera’s focus would not revert from the animals to the trees. If you were taking photographs in this situation and AF was still assigned to a half-press of the shutter button each time you would need to focus using one AF point and then recompose each time.
This is a beginners guide to AF and how best to use it. In order to find these setting on your camera, we encourage you to check your user manual or YouTube for guides on how to use these functions on your own camera.
- By Matthew Ward
- 5 Jul 2017


