


A Beginners Guide to Shooting Portraits with Flash
This Spring my family hired a beautiful house in the idyllic countryside of Hertfordshire, eight miles from the town of Ross-on-Wye. The house is a grand Tudor building sat on top of a hill overlooking the Black Mountains on the other side of the valley. There were eighteen of us staying in the house. It had more rooms than I cared to count, a pool table, a huge two-tier garden and some of the most amazing decorative features.
We were there for my Grandparent's birthdays. They both turned eighty in the last few weeks and we were there to celebrate their achievement. My Grandfather had been ill this past year so having the family together made this weekend together all the more special.
He’s on the mend and playing golf again but it made me realise, as morbid as it sounds, we’re not here forever. I usually treat family occasions as my time to put the camera down for a minute and put my feet up. However my Grandfather’s illness reminded me that I don’t have many pictures of him and I should make an effort to capture my family more often.
Our weekend together was the beginning of what will hopefully be a growing catalogue of family photos. This was the inspiration for this blog about portraiture lighting.
Keep it simple while you're gaining experience and focus on your lighting.
Think about how you want the end product to look. Also think about the way your subject will be posed, seated or stood. This is key to how you will position your lighting and means you'll be able to cycle out multiple subjects without changing your set up for each. This ties into my second point; ask yourself questions like do you need props or space for large groups? Keep it simple while you're gaining experience and focus on your lighting.
The room I would use had been decided by default as it was the only room no one was residing in over the weekend. In your home or workplace you may have to work with limited space and work around others but aim to shoot somewhere big enough to put lights up and long enough to use a decent portrait lens, for instance, an 85mm (optional). My studio became a narrow room, I had hoped to use the bookshelf as my backdrop but the lens I wanted to use wouldn’t allow it, and I was fored to set up length ways instead.
Being prepared means you'll have the maximum time available to shoot.
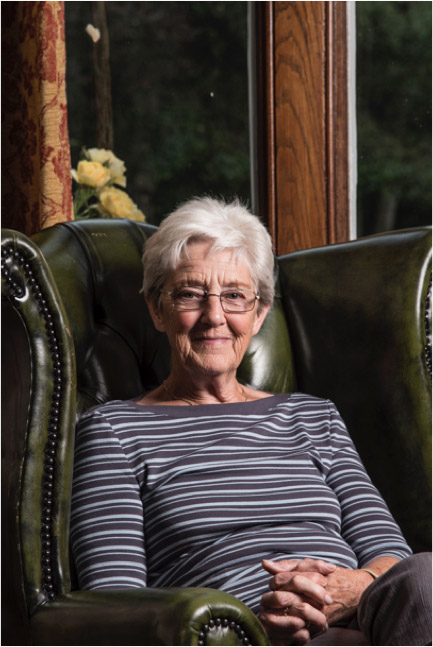
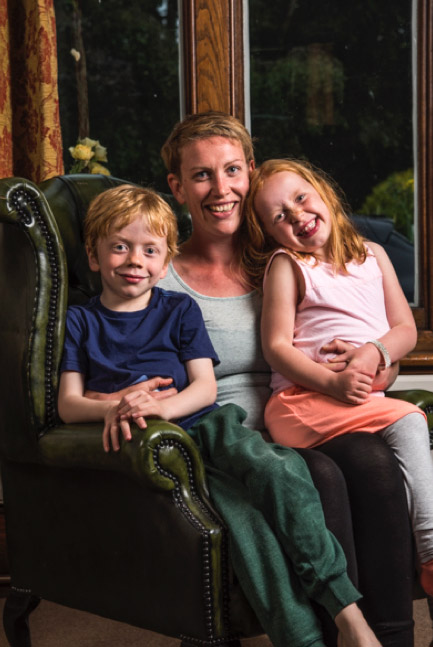
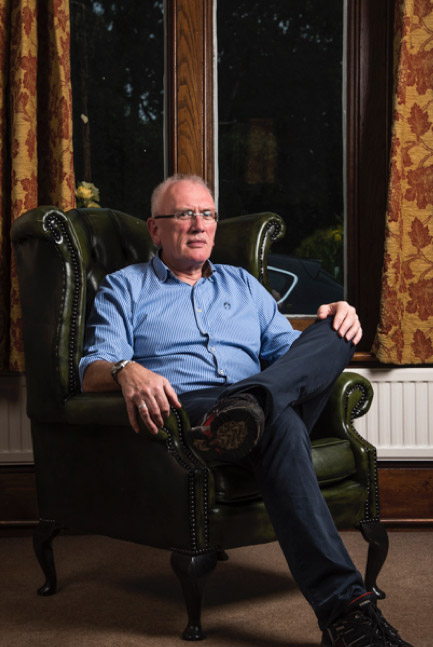
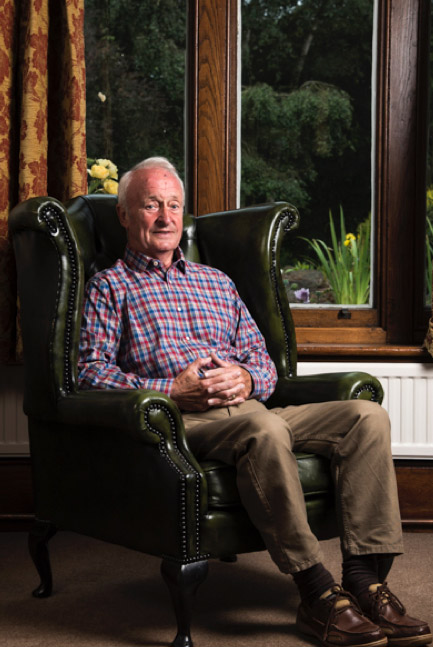
In my mind's eye, I wanted to photograph grand portraits as if I were shooting the Queen, the kind of thing you might see adorning the walls of the nobility. I felt the style suited my surroundings and I had found a winged Winchester style armchair in another room which was perfect. A word to the wise; try to prepare your lights before you begin the shoot. Not many of us get an exposure right first time, try your lighting on a test subject, being prepared means you'll have the maximum time available to shoot. You’ll also demonstrate professionalism and inspire confidence in your client by having pre-planned. Not only this if you're shooting young children you want to make it as painless as possible on Mum and Dad, being prepared means less time floundering with your set up so you can get them in and out.
Begin with the main light. This is simple, I know, but many people will move on to light two or three before making sure their first light is satisfactory. I was certain my subject seated in the chair was going to be facing to their left, so I set a large octobox up in front. This cast a soft light over their face and eliminated dark shadows from the winged arms of the chair. My octobox has to be one of the best light modifier buys I have made. It’s not huge, only 90cm in width, but the spread of light is fantastic for portraits and not as regimented as a square softbox.
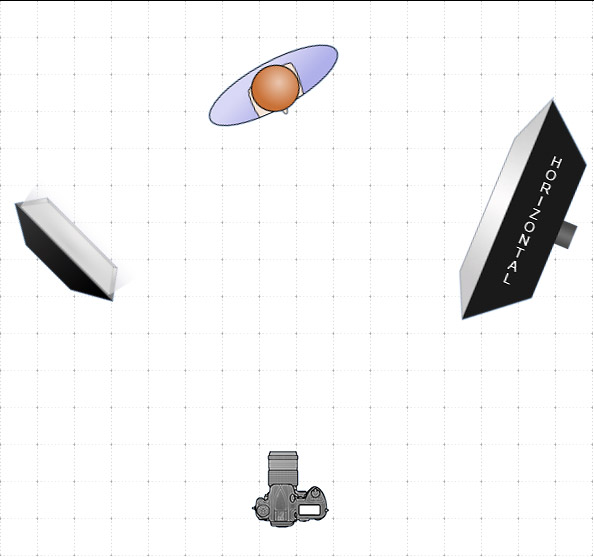
I was happy with how this looked and at 1/8, I was unsure whether or not to use a second light but you can always set up a light and turn it off if you find it to be unnecessary. The octobox is adequate to shoot one person but struggles with groups. I also found the shadows on the right side of my subject's face was too dark. My second light modifier was a 60x60 cm softbox. I placed this on the opposite side positioning it higher and pointing downwards at 45-degree angle. The intention was to bring out the background, while filling the shadows on the right side of the face. This was put on the lowest power setting so as to not overpower my main light and instead illuminate the edges of my subject.
Gear:
Nikon D750
Nikon 24-120 f/4 VR
Nikon 85mm f/1.8
2x Bowens Espirit 500
Shot Details:
Aperture | f/8 or f/11
Shutter | 1/160
ISO | 100
Flash is a big step and a difficult part of photography to master, but take it slow, start small and don't be afraid to fail. Photographing friends and family can be a pleasant experience and will surely produce images to cherish. Not only that but shooting subjects you're familiar with often helps to alleviate nervousness and you should find yourself under less pressure to perform meaning you'll be able to play with your settings and learn while having fun.
- By Callum Burns
- 20 Jul 2017


