


The fundamental rules of photography
Follow these simple rules to get the shot you want.
Whether you’re making the step up from a smartphone, or simply want to get to grips with your camera, then one of the fundamental rules of photography is to master the exposure triangle.
Made up for three variables to determine the exposure of a photograph: aperture, shutter speed, and ISO, you must balance these three settings on your camera to achieve the desired final exposure of your shot.
Just as importantly, not only do they affect exposure, but they also play an important part on the aesthetic and look of your image – let’s take a closer look.
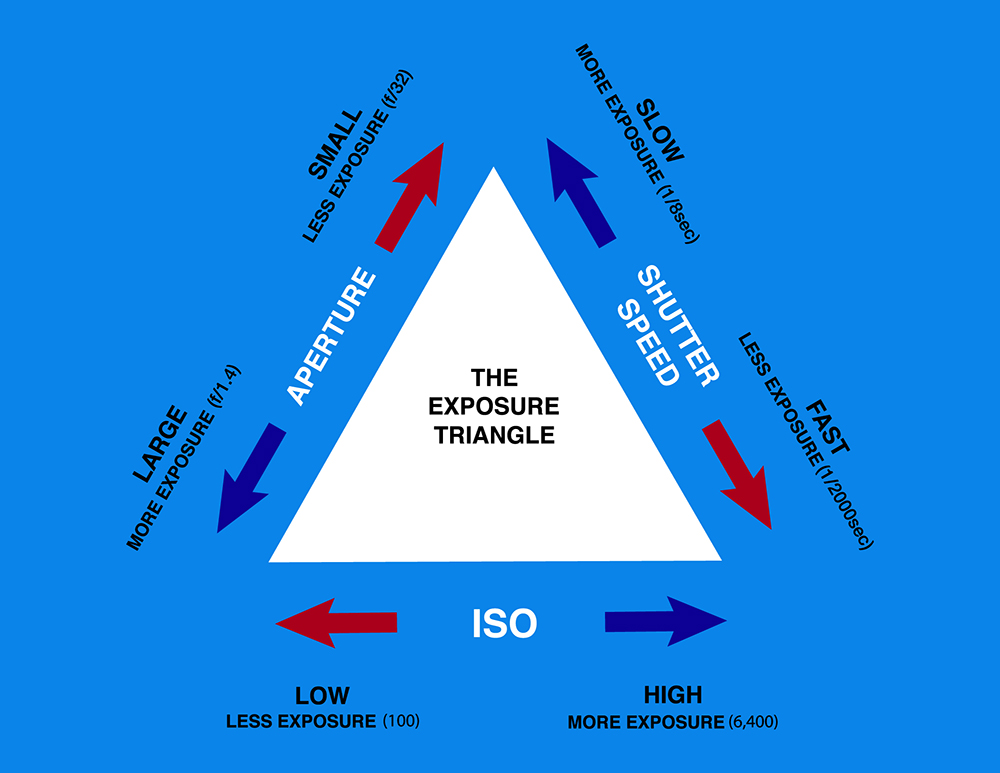
Side 1: Aperture
The aperture is a measure of how much light is let through the lens, with the aperture blades opening and closing like the iris of an eye. How wide open the aperture is is measured in f-numbers, with a wider aperture (lower f-number) letting more light in than when the lens is closed down (a higher f-number).
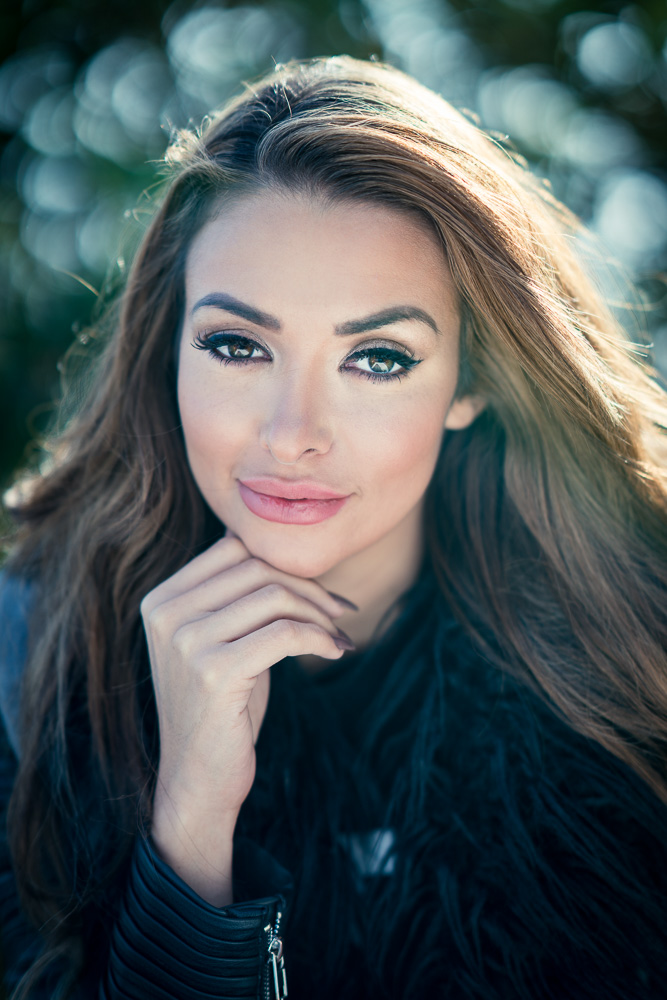
While it might not sound appealing to limit the amount of light hitting the sensor, the pay off is increased depth of field, allowing more of the scene to be in focus, while wider apertures are desirable to reduce this zone of focus and isolate elements in the scene that you’ve focused on.
Side 2: Shutter Speed
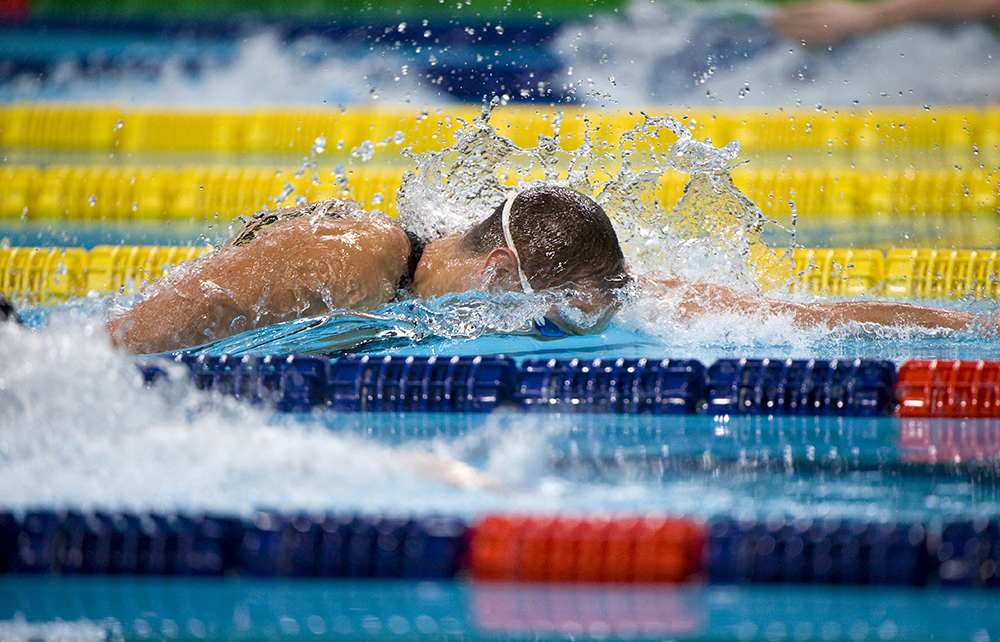
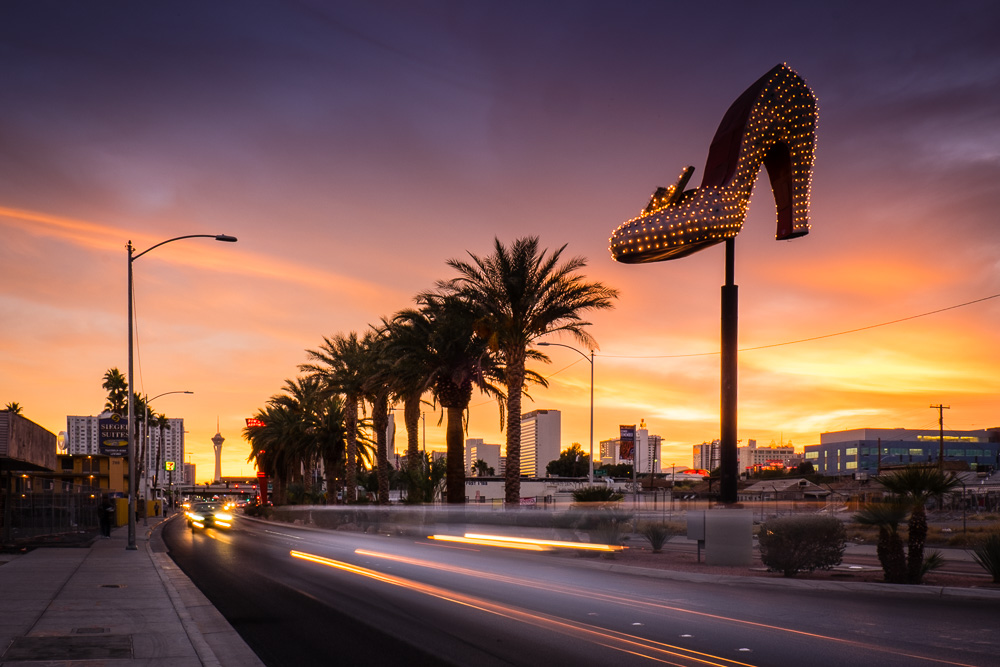
This determines how long the shutter remains open, resulting in how long the sensor is exposed to light. To help freeze your subject and stop any motion, you’ll want to use a fast shutter speed, whereas if you want to blur movement, you’ll want a longer shutter speed. It’s important to consider this when handholding, as using a relatively slow shutter speed can see a slight blurring of the image from camera shake, resulting in a loss of sharpness.
Side 3: ISO
Compared to a roll of film which would see the ISO set for its 24 or 36 exposures, digital allows us much greater flexibility, allowing us to change it for every single shot if we wish.
Increasing the ISO essentially makes the sensor more sensitive to light, requiring a shorter exposure to produce a correctly exposed image, enabling you to use the optimum combination of aperture and shutter speed that wouldn’t otherwise be possible for a lot of shooting situations.
The trade-off though is that as you increase ISO, image noise increases (digital grain) that will see the image quality deteriorate, with detail suffering.
Balancing exposure
A combination of aperture, shutter speed and ISO are referred to as an Exposure Value (EV), and because any change made to the values of the aperture and shutter speed either doubles or halves the amount of light reaching the sensor (and with ISO, doubles or halves sensitivity), it’s known as a stop. If you increase one element by a stop, you’ll have to decrease one of the other two elements by a stop to maintain the same exposure. Alternatively, increase one side of the triangle by two stops, and you can either reduce one of the other elements by two stops, or decrease both by one stop.
To work out the exposure, the camera will take a meter reading to assess how much light is available. It’s at this point you might want to think what you want to give
priority to in the shot – depth of field or how much blur you want recorded. You can then set this variable, before balancing this with the other two sides of the exposure triangle.
Alternatively, rather than controlling all three elements, you can rely on your camera’s shutter speed or aperture priority modes to balance the exposure for your – for instance, in aperture priority, set the desired aperture (and ISO) for the scene you’re shooting and the camera will automatically set the appropriate shutter speed for you. It’s also possible to have the camera set the ISO for you too via the camera’s Auto ISO mode.
- By Matthew Ward
- 5 Oct 2016


