


Mastering the Flash
Everyone has, at some point in their lives, tried to use the flash of a camera to brighten up a scene. More often than not, the flash pops up for your shot and suddenly the photo looks nothing like you wanted it to. Then, when you try and fix it by turning the flash off, you can’t capture any detail due to the darkness.
For experienced photographers, this problem is easily remedied by changing the exposure settings, dropping the shutter speed and widening the aperture. However, the flash itself is a tool that can be manipulated and mastered to create a huge range of different outcomes.
Understanding flash
This article is only useful if you first understand the exposure triangle. Once you’re familiar with exposure, the first thing to understand about flash is that you are shooting with two light sources: the actual light in a scene (no matter how dark it is, you’ll always have light entering the camera) and the light from the flash itself.
To get good photos, you’ll need to learn to balance the two. Flash also helps ‘freeze’ motion, which can make it useful in sports and motorsport photography.
Mastering pop-up flash
The ‘pop-up’ flash on your camera is not the best tool for flash photography and is sometimes ditched entirely on higher-end DSLR cameras. It is a fixed flash, meaning you can’t point it away from your subject. This can lead to ‘flattened’ photos, which makes everything look like part of the background. There are a few things you can do to rescue internal flash imagery.
Do not use pop-up flash for the following:
- Shooting large scenes outdoors: The flash won’t be powerful enough and you’ll end up getting bright foregrounds and completely miss whatever it is you’re trying to shoot.
- Gigs: Flash will not only distract the performer, but you’ll also end up with awkward, flat photos.
- Street photography: The bright, startling flash of a camera is a great way to announce your activity to the world. If you’re trying to get candid shots, turn your flash off.
Use a flash diffuser
Due to the small size of the light source, the flash is very harsh and can cause all kinds of image problems – from deep shadows to bright, unwanted highlights. You can help avoid this by either purchasing a flash diffuser or by making your own. A light, thin translucent material over the flash will ‘soften’ the light.
You can also use a non-translucent piece of material like a card to direct the flash at the ceiling, which will bounce the light back down. However, this won’t work with high ceilings, as most pop-up flashes aren’t powerful enough.
Flash exposure compensation
Modern cameras use TTL (through the lens) metering, which adjusts exposure above and below what the camera considers to be correct. Flash exposure allows you to increase or decrease the output, and brightness, of your flash to help balance the power of the flash with the ambient light in the room.
Fill-in flash
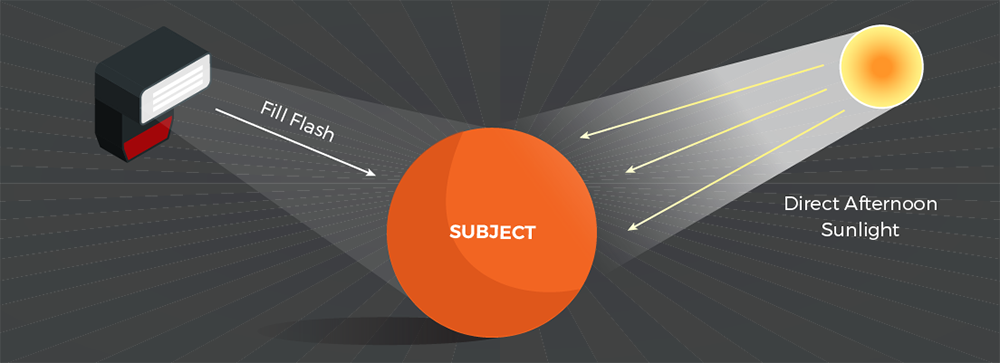
As you probably know, flash isn’t just for interior shots and night scenes. You can also use flash to ‘fill’ images and bring them to life by lifting dark shadows. This is commonly done during portrait photography. The flash won’t usually fire in lighter settings, so ensure you have set the camera to ‘forced flash’.
Fill-in flash is useful for back-lit subjects, as you’ll be able to capture details in the surroundings even if the subject is in shadow. This is especially useful in sunny scenarios where the sun behind your subject can ruin a shot.
Ultimately though, you’ll need to buy a separate flash gun to ensure you get the most from your flash photography.
Using external flashguns
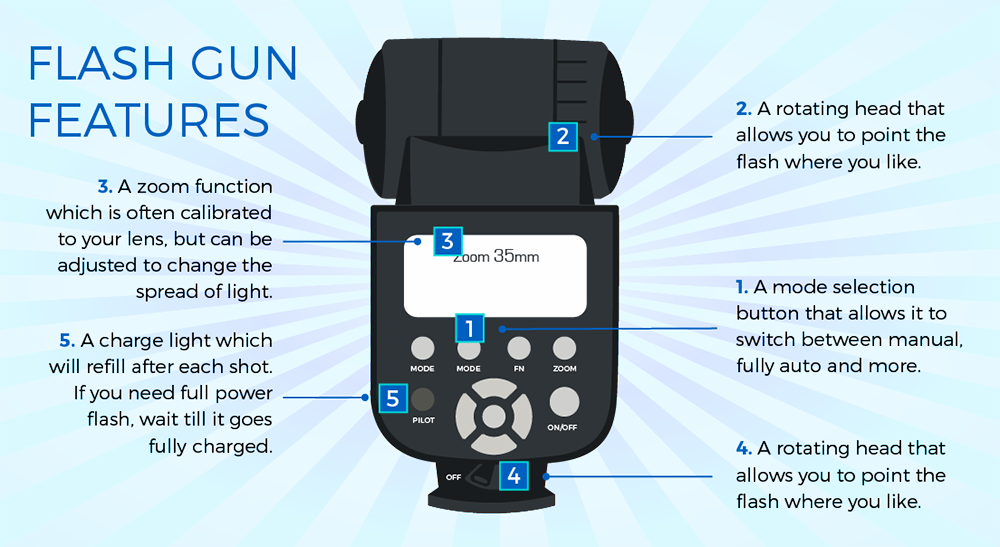
An external flashgun fitted to the hot shoe of your camera gives you a huge amount of added control over how your flash functions. They swivel 270 degrees on a vertical plane, so you can point them at the ceiling to grant soft light to your image.
However, learning how to use them can be tough. Generally, a flash gun will have the following features:
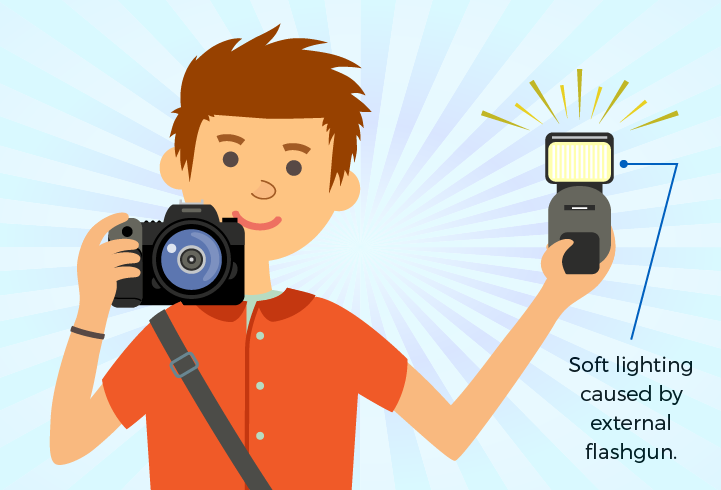
Off-centre flash
Once you’ve got an external flashgun, you can start to experiment with freeing up your flash and positioning it away from the camera. In the example image below, the photographer will create soft lighting on the right side of their face, which could balance out the sun on the left of the subject or, if there is no sunshine, create a dynamically lit image.
This idea can also be transferred to multiple flash guns. You can use more than one at a time to create a huge variety of exposure settings. Placing a flashgun at the side of a subject and one behind them will light them up from the side, but also create a backlight.
Final thoughts
The flash is a tool for photographers to experiment with. You can set your flash to ‘second curtain’ or ‘slow sync’ flash to capture light trails and a sharp image, freeze motion or illuminate a portrait – but you’ll first need to understand how to avoid poor shots. By reading this article you’ll be on your way, but practice makes perfect. So, get out and flash some images.
- By Matthew Ward
- 15 Nov 2016


