


The Definitive Guide to Wedding Photography - Five Steps for Success
Wedding season is in full effect and it's odds-on that you or someone you know is either A) getting married or B) attending a wedding. Surrounding the forthcoming nuptials is an industry worth billions of pounds. In 2011 the industry was estimated to be worth a considerable £10 billion. At the time the average cost of a wedding was estimated to be between £10-15,000, bridal publications now estimate that cost to be as much as £30,000.
Every wedding must have a photographer, in the same way, a bride must have an engagement ring. For that reason, there are a lot of people in the wedding photography trade. The best way to distinguish yourself in a saturated market is by offering a personal touch and superior service, don't lower your pricing and devalue your work. In a crowded market establishing your own style and building rapport with your clientele is a surefire way to differentiate yourself and earn more business.
No two weddings are alike and events may take place in a different order, with that in mind here's a quick guide on how you can make every shoot a success.
What gear do I bring to Photograph a Wedding?
So that we're on the same page here's a list of the kit I work with. In the days leading up to a wedding check and clean lenses, and camera bodies, and charge batteries. Here’s what I carry:
3 x Camera Bodies: Nikon D3, D750, and D850
5 x Lenses:
1 x 50mm lens f1.8
3 x Flashguns: Nikon SB-700, SB-800, and SB-900
1 x Tripod
1 x Monopod
6 x Memory Cards
2 x Constant lights with barn doors
Break the day down into 5 manageable segments. Weddings are often day-long affairs and it's easy to get swept up in the continuum and forget key shots. By applying structure to the shoot you can portion out your time and better keep track of your wedding photo shot list. There's nothing worse than getting to the end of a ceremony and realising that amidst the chaos you forgot to shoot the cake table.
Break your wedding photo checklist into 5 parts:
- Bridal Prep
- The Ceremony
- The Guests
- Speeches
- First Dance
Photographing the Bridal Preparation
Liaise with the bride and groom before their wedding day to discuss the schedule and details of the day.
Tip: Ask questions and include things like: “Will you be wearing any family heirlooms? Are there any surprises I need to be aware of?”
Simple questions like these will help you document meaningful sentiment and better anticipate photo opportunities.
Get to the bride 2-3 hours before the ceremony when the bridal preparation is underway. The bridal party should be relaxed and presentable for photos. This may also be an opportunity to capture them in bridal nightwear or pyjamas, however, don't arrive too early as you'll make the party feel uncomfortable and waste time unless prearranged.
During the prep keep out of the way; find a corner of the room, observe and shoot on a wide lens. These are your establishing shots and capture the excitement on the morning of the big day. Keep an eye out for personal details like cards, notes, a champagne cork or a bottle of perfume. All are unique reminders of the day, and often shots they’ll be surprised to see.
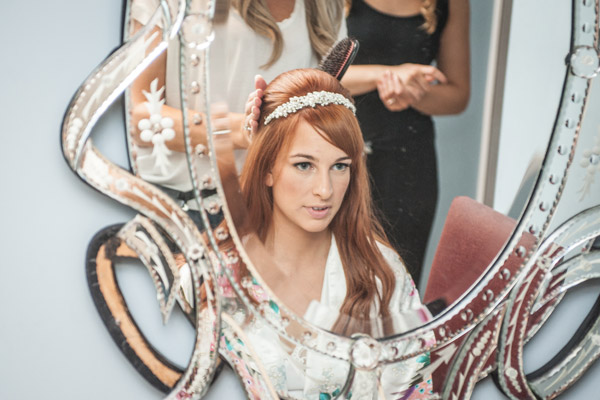
Take advantage of reflections in windows and mirrors. Shoot through flowers creating soft colourful edges around the photographs.
Once you've set the scene move in closer whilst the hair and makeup are being done. Try using ambient light with a slower shutter for some images, then mix in some fill-in flash for other images. If there is a large natural light source like a large window, try boosting your shutter speed for silhouette shots keeping the flashguns off.
TIP: Get above the bride's eye level and shoot down when possible.
Speaking with the bridesmaids and bride in the morning before the dress goes on is a good way to get the bridal party on your side and build rapport you'll be able to use to direct the wedding party later in the day.
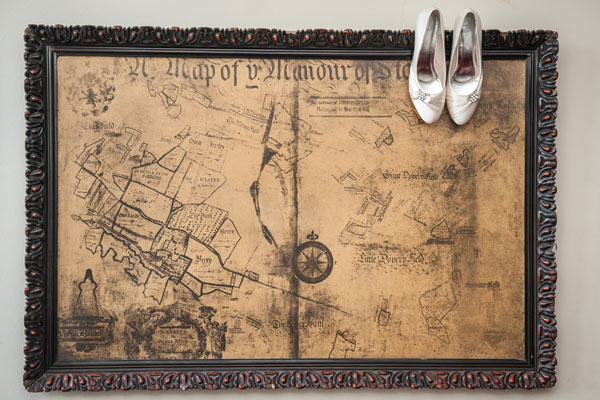
Time for the 'must get' detail shots: shoes, dress, garter, rings, necklace, earrings and bracelet.
Don’t be afraid to hang the dress off the bed if it’s a hotel four-poster bed. You may need to find a windowsill or an area of interesting contrast to shoot details and jewellery. I’ll often change to my 50mm 1.8 to show the depth of field, and create some magic in the background.
Take the opportunity to photograph the tables and favours in the dining room while the bride begins getting ready. Often the wedding breakfast takes place in the ceremony room, be mindful that the staff will need to turn the room around and you may have to wait for those shots. Shoot wide, I use a 14-24mm lens, to capture the room as a whole then shoot details on a wide open telephoto lens using that wonderful bokeh effect to create images with a dreamlike quality.

Once you've made a sweep of the ceremony room find the groom; rinse and repeat the same process used for shooting the bride. Shooting the groom and ushers while mixing in some fun shots is another great opportunity to build rapport with the wedding party. Fostering harmonious communication between wedding attendees and the photographer puts people at ease around the camera and will help direct the party for group shots.
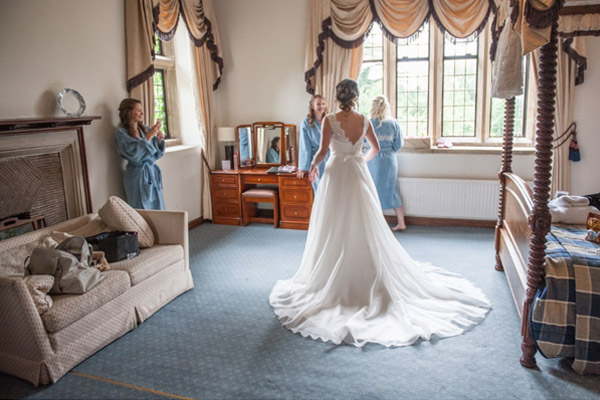
Finally, I circle back around to the bride for my final shot of the morning, the bride being buttoned into her dress.
How to Photograph a Wedding Ceremony
Let the fun begin!
Whilst the bride is meeting the registrar, or in the case of a church wedding the vicar, establish your place in the ceremony. Always introduce yourself to the vicar at a church wedding and ascertain where he wants you, whether you can use flash and if you’ll be able to move around.
Accept their decision!
If there’s a videographer at the ceremony they will more than likely be set up by the time you get there. Introduce yourself and let them know where you want to be – it’s ‘give and take’ and you must be aware of each other and work to avoid being in each other's shot.
The couple has spent money on both of your services and expect each of you to deliver, it is essential you work together.
If you’re unable to use flash during the ceremony, it is worth asking if you can use it as the bride enters – but remember to turn it off when she is in place.
Always stand to the left and slightly behind the vicar or celebrant, so you're able to shoot the bride's face throughout the ceremony.
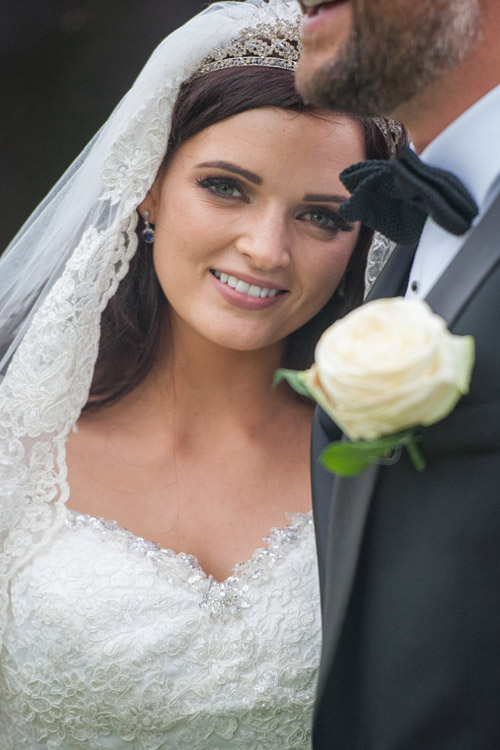
TIP: Look for the couple holding hands, the rings, and nervous smiles that will inevitably be on show.
During the ceremony, I’ll have a 24-70mm lens on one body and a 70-200mm on another so that I'm able to quickly switch between the two. Having the two cameras at the ready is useful for capturing wedding guests, wide shots of the ceremony and tight detailed shots.
TIP: When asked “does anybody know of any legal reason why these two people can’t be joined together matrimony?” ready your camera, you may get a response!
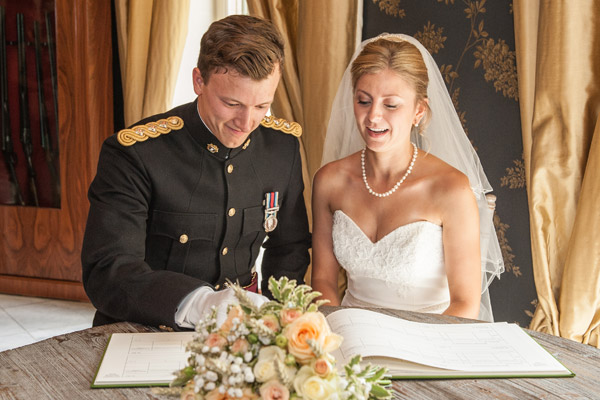
After the ceremony shoot the couple as they sign the register. Be aware of your surroundings and pay special attention to glass windows or doors so as to avoid flash bounce or reflections. Get the shots you need, then the guests may be asked if they want to take a photo.
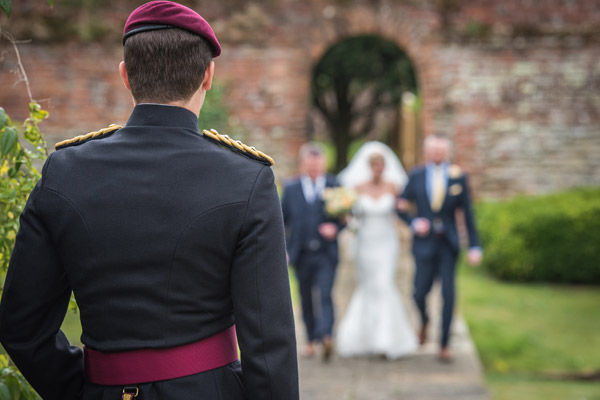
Now prepare for the bride and groom to leave, adjust your settings. For this shoot wide from 24mm all the way through to 70mm. Don’t be afraid to stop the couple as they get closer and ask them for a brief kiss, a little affection makes a great photo.
Tip: Capture a modern moment by shooting the back of a guest's phone taking a photo of the bride and groom. Four out of five people have a smartphone so you'll have plenty of opportunities to get this shot.
Guest Photography at Weddings
With the ceremony over, this is my favourite time to shoot – canopés!
Arm the best man and ushers with a list of group shots the bride and groom have requested. The best man can prove a powerful ally and will know the wedding party well. Use his help to rally the troops and get these group shots out of the way as soon as possible. As you begin shooting one group have the best man and ushers round up the next group. This speeds things up considerably.
Choose an aesthetic backdrop; where possible position the sun behind the group and off to one side. Positioning the group this way helps to keep the light tone consistent and prevents squinting. Use a lens hood and check your images as you go.
Tip: Take a minimum of 5 shots of each group, you can guarantee someone will have their eyes shut on at least 3 of the images.

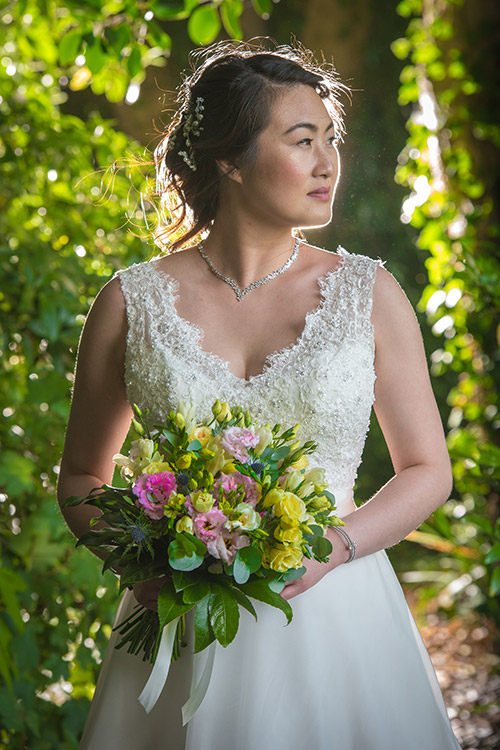
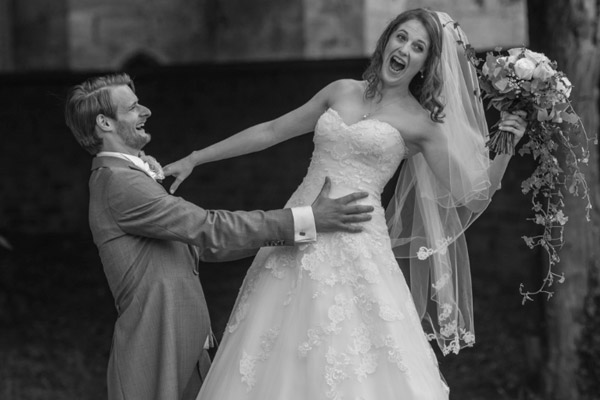
Once group photos are complete whisk the bride and groom away for 20 minutes of intimate photography. Shoot into the sun for dreamy images and don’t be afraid of lens flare. However, don't overdo this approach and waste time trying to perfect this one photo.
Walk with the couple but drop back, then run ahead, and record these moments on your telephoto lens. Use the surrounding areas of the venue as the backdrop.
Replace the zoom with your wide-angle lens, capture the whole venue in at least one of the images. If the light is flat consider using off-camera flash to add some drama to your image. Anticipate the lighting and use a quick and easy speedlight setup.
Remember to work quickly and positively, the bride and groom will likely enjoy the respite from the constant attention but will soon want to return to spending time with their guests.
Tip: Once you've separated the bride and groom from the wedding party for the couple's photos, ask them to practice their first dance. This will build their confidence and draw out smiles, laughter and naturally embracing poses they may otherwise feel uncomfortable doing.

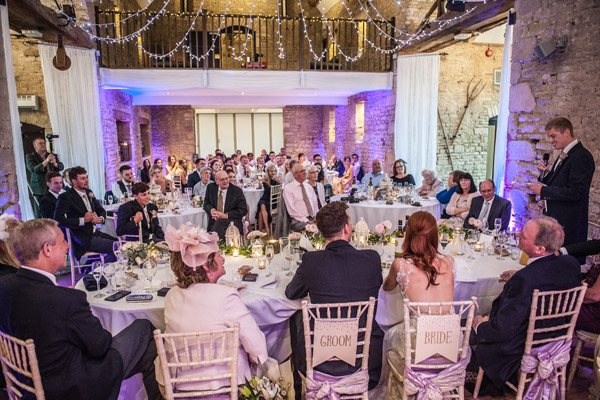
Tips for Photographing Wedding Speeches
Establish whether the speeches will be before or after the wedding breakfast – before is becoming more popular. You don’t want to miss it whilst tucking into your egg sandwiches!
Determine how many speeches there are, who from and where they are sat. Not every speech will come from the top table.
By now the light may be fading or you might be in a dimly lit barn. Be sure your batteries are charged for your flash. Shooting in manual rather than TTL to preserve battery life and keep a second or third set of spares in your pocket.
Tip: Consider using a monopod if you are shooting on a long lens with flash. It's a long day, do what you can to lighten the load!
There are two approaches to photographing speeches. You can either use a short lens and move to your subjects. Or use a long lens and be further away. Do whichever fits the occasion and your photographic style. I used to photograph the speeches by moving to my subjects with a 24-70mm lens. I now use a 70-200mm lens because it allows me to be more discreet.
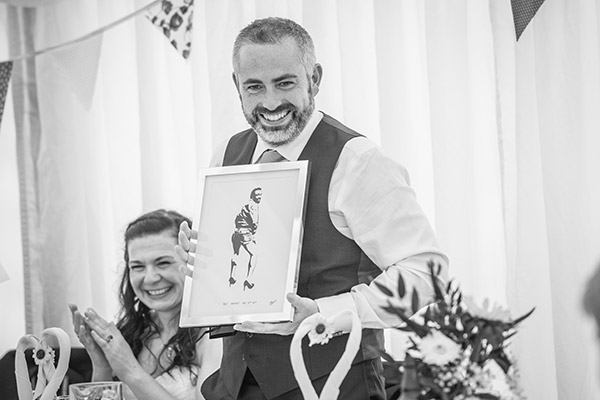
Once you’ve captured 6-7 good shots of the speaker, always concentrate your photographs on the guest's reactions to the speech.
Tip: Get behind the head table. Shooting guest's reactions from here you'll capture the bride and groom's viewpoint and will preserve fun moments.
Keep your eyes peeled for young children playing around and hiding under the tables – they make great shots!
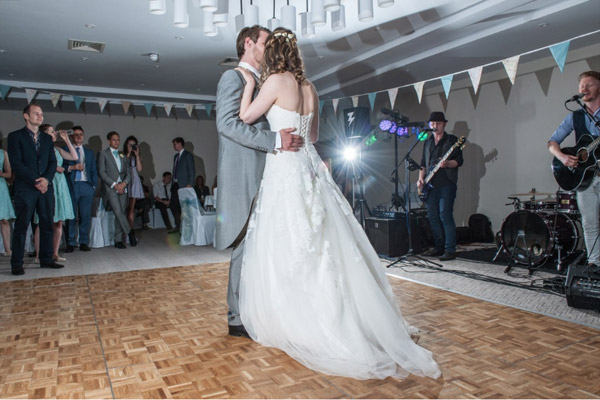
First Dance Wedding Photos
Dig in! You’re almost there.
Be aware that lighting is going to become more challenging and unpredictable as the day goes on. As the night draws in you'll have to contend with gradually less light while accounting for the venues available lighting, candles, and disco or stage lighting. If you like to use off-camera flash for creative shots with lens flares be sure to have practised the technique before covering the first dance and remember your flash will overpower the DJ's disco lighting.
My telephoto lens is now packed away. I set up two off-camera flashes at opposite corners of the dance floor. Using the 24-70mm lens I take a few test shots to get the right exposure, usually of children sliding over the dance floor… you know the ones!
Tip: Hopefully by now you've befriended several members of the wedding party; if you can, politely recruit two of them to watch over your off-camera flash stands during the first dance.
Light stands are a magnet for tipsy guests and excited children. Try to keep them guarded as guests have a habit of falling into them or standing in front of them. If this happens it will disrupt the dance and your photographs.
Some photographers prefer to use on-camera flash, and others will simply bump up their ISO and use available light. You may use a combination of the two; do what fits your photographic style. Master your technique and be consistent.
However, you choose to cover the first dance vary your angles. Move around the dance floor. Shoot from the floor, above your head, and from the hip. You’ll be pleasantly surprised by the different perspectives and styles of these images.
Tip: Speak with the bride, groom, and DJ and agree that guests won't be invited onto the floor until the end of the dance.
Once the guests crowd the dance floor you’ll lose your off-camera flash capability and it may be time to go back to on-camera flash.
The Final Shot:
After I'm packed up I take a moment to stroll the venue, find a scenic vantage point, and punctuate the wedding with a long exposure of the venue at night.
It is a beautiful way to surprise the bride and groom and end the days’ coverage.
View more of Rob Wheatman's work on his website:
or view his: Instagram
All images except for camera and lenses © 2018 Rob Wheatman.
- By Rob Wheatman
- 10 Jul 2018


