


Neutral Density Filter Explained
A neutral density filter is designed to reduce the amount of light that enters a lens, thus restricting the amount of light that reaches the sensor (or film) and changing the exposure settings that are required.
Often referred to as ND filters, neutral density filters are available in a range of strengths or densities. The weakest look pale grey, while the strongest or densest are deep black and are hard to see through without the aid of strong light. Consequently, the densest filters cut out the most light and have the biggest impact upon exposure.
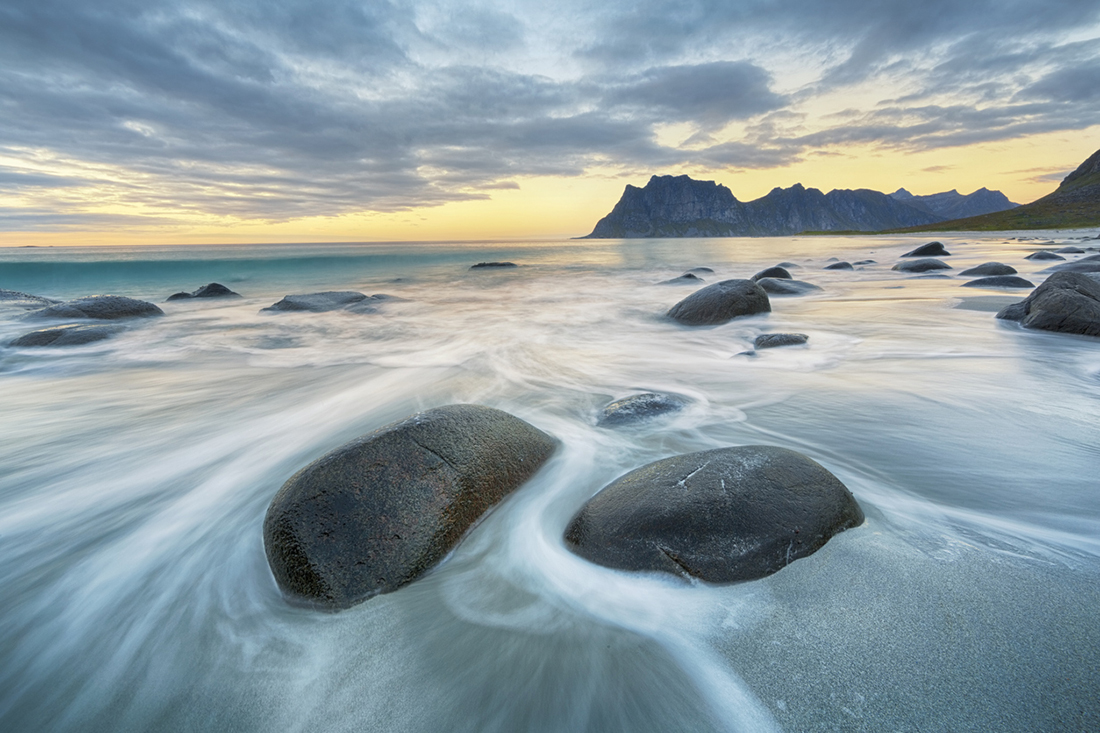
The most common use of a strong ND filter is to enable a long exposure time in daylight. This is usually to record movement as a blur, and is particularly effective with moving water or fast-moving clouds on stormy days.
Using a strong ND filter
Because ND filters are hard to see through, it’s usually necessary to set up your camera, compose the image and focus on the subject before you attach the filter to the lens. In order to save the focus from adjusting in error, you’ll also need to set the focusing to manual.
You should also set the camera to manual exposure mode, and select the aperture that you wish to use before finding the shutter speed that would correctly expose the image without the filter.
Once everything is ready, you can mount the filter on the lens. If you’re using a DSLR you won't be able to see much through the viewfinder when the filter is in place, but you may see an image on the screen if you switch to Live View mode or if you’re using a compact system camera – it depends on the camera you’re using.
The next step is to adjust the shutter speed to compensate for the filter. If the shutter speed is 30 seconds or less, you should be able to make the adjustment using the camera’s exposure meter as a guide. Another route relies on you knowing the strength of the filter: variable strength ND filters are available, but they are also available in fixed strengths such as an ND8, which extends the exposure by 8x or 3 stops (EV) – or an ND16, which extends exposure by 16x or 4 stops.
If the exposure without the filter was 1/60sec, using a 4 stop or 16x filter will extend the shutter time to 1/4sec. If you want an even longer exposure time you can either fit two ND16 filters or use a denser filter. In our example, using two 4 stop filters would extend the shutter time to 4 seconds.
If the shutter speed extends beyond 30 seconds then you’ll need to use Bulb mode and a remote release to avoid blurring the image while taking the photo. In this mode, the shutter stays open for as long as the remote release is locked down. You need to time the exposure yourself (there are plenty of apps available to help with this!) and unlock the remote release to close the shutter at the end.

Going wide
Another use of ND filters is to allow you to shoot with the lens aperture wide open in very bright conditions. This is especially helpful for portraits when you want to blur the background but not burn it out. These filters also come in handy for videographers, who can’t usually use as fast a shutter speed as stills photographers can.
Read next
Thank you!
Thanks for taking the time to read our blog, we really do hope they help you out and answer some of your questions. If you still have some unanswered, then please feel free to get in touch with our team of experts.
We have a LiveChat option on our website and we can, of course, be contacted via our email, we're also on the end of the phone too! Read more on how to contact us here >
Want to write for us?
If you've got experience with producing content on photo, video and/or optics products or techniques then we would love to hear from you. Contact our blog editor, Fee, with a sample of your work at [email protected].
- By Matthew Ward
- 24 Jan 2017


