


Getting Started With Landscape Photography
Landscape photography. A diverse and impactful genre. No matter if you're a hobbyist or professional, this genre has always captivated us in the search for "more". Whether we return to the same location for several days, hoping for the perfect light, or yearn to explore every nook and cranny of the Earth, always moving and searching for that perfect photo.
The truth is that the search never stops. It's the central element in any art form that drives us. It forces us to go back, re-evaluate and try again.
It forces you to question, strategise, and execute, to further your search for that one perfect image. It could take days, months and even years to find.
In this guide, I aim to help you in that search, although, I have to be honest, I too am searching for my perfect image. But maybe there is something useful I could offer if you're starting on this journey in pursuit of the perfect landscape photograph. So let's start with the basics, shall we?
Gear
Firstly, forget about the technical specifications of gear available today. Find the camera that you're most comfortable using. It could be anything from the form factor to the menu layout. Find something that resonates with you.
Secondly, megapixels do not matter unless you plan on printing your images. You can take a photo with an outdated Canon 5D Mark II and a newer Sony A7R V, and I guarantee you won't see much difference on a computer screen. Of course, if you plan to print an A1-sized image, the 61 Megapixel Sony A7R V will be the clear winner as it has much more resolution than the 21 Megapixel Canon 5D Mark II. However, if printing is not your main priority, then composition, lighting, subject matter and perhaps storytelling should be more of a concern.
We get tied down with trawling the internet for the latest camera releases. We read reviews, ask questions in forums and take advice from pixel peepers, and by doing this, the hunt for the perfect camera has drawn our attention away from obtaining that perfect photo - the very thing we set out to capture in the first place.
Find a camera that fits you. Not the other way around. This way, you can focus on telling a story rather than the technical aspects of capturing an image. I could tell you what applies to me, but it doesn't necessarily mean you'll feel the same and don't let the specs fool you either. A camera is just a tool. It's a conduit for your mind's eye to become a realisation. Once you master it, the world is your oyster.
Lenses
Whilst wide-angle lenses are most commonly used in landscape photography, any lens can do it. A 14mm or 23mm will do an excellent job of capturing sweeping scapes and rocky shores, while a 70-200mm, or even more, grants you exclusive access to distant nooks and crannies otherwise unreachable.
An example of using a 70-200 f2.8 telephoto lens for landscape photography
Tell a Story
Photography became a powerful tool when society realised the storytelling capabilities it had to offer. From Henri-Cartier Bresson's Decisive Moment, Kevin Carter's Vulture and The Little Girl to Ansel Adams' Snake River, photography has had a stranglehold on our visual cortex from the time of its inception. We use photography as a medium to connect, perhaps now more than ever due to its accessibility. Isn't that the point of it all? To connect to another human being, perhaps on the other side of this planet?
Plan Your Journey
You've got a camera, lens and tripod, and you're ready to start shooting. Now, where do you go?
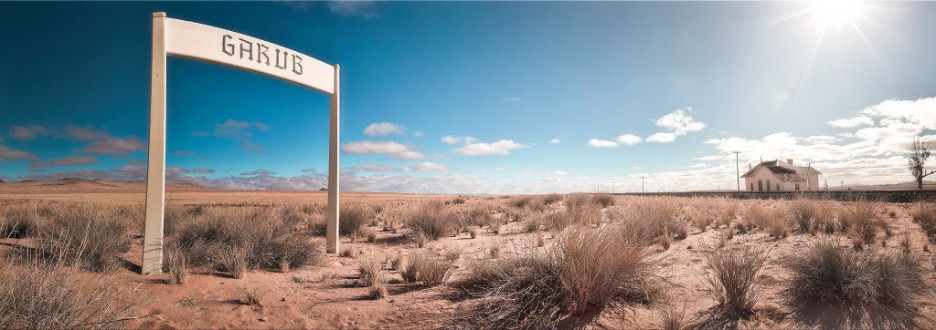
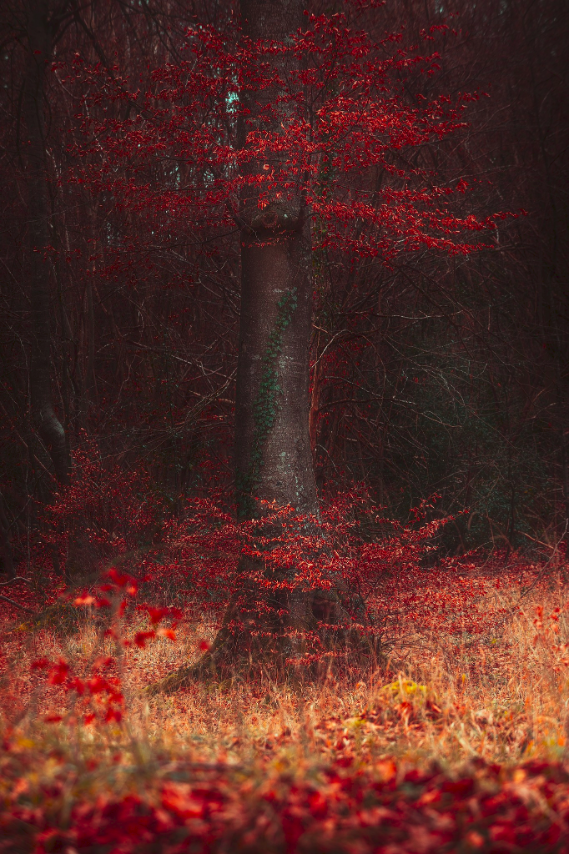
Perhaps you want to capture the beauty of autumn early in the morning as the fog rises through the woodland, or you are willing to travel to Lofoten and capture an image of the Northern Lights as they reach their peak above the snowy peaks of Langlitinden. How does this tell a story, you may ask? Perhaps the image is the conclusion to your journey of how you got there in the end, or perhaps, it's just the start. If you need to plan your journey, there are a few smartphone apps that would aid your planning in capturing the best image.
- The Photographer's Ephemeris
This app is a fantastic tool for landscape photographers to plan their shoots. It allows you to see where the sun and moon rise and set, allowing you to plan your composition better through satellite imagery. The app gives you an insight into how shadows move across landscapes. It also provides an accurate depiction of light pollution in your area. The app is available for £9.99 on the IOS store. Unfortunately, it's not available on the Google Play Store for Android at the time of writing.
- PhotoPills
PhotoPills is a fantastic alternative for those who wish to use the Photographer's Ephemeris on Android. It provides all the features you want from The Photographer's Ephemeris, along with calculators for shooting long exposures during daytime and nighttime. PhotoPills also include a handy Augmented Reality mode, allowing you to view what's above you at night. This includes the milky way, constellations, planets and the sun! PhotoPills is available for both IOS and Android for £9.49 at the time of writing.
Once you've found the location you wish to shoot, all you need to do is pack some snacks, a coat (depending on the time of year) and some Welly boots, and head out. Don't go in with the mindset of capturing an award-winning image straight away. Think of your journey as just scouting an area and taking a few photos along the way. This way, you are more at ease.
Any number of images will come to you in the time you have and if you walk away with one photo you're happy with after shooting 200 shots, consider that an achievement. Return to this location a month later to see if there's any change, and repeat the scouting process as something else may catch your eye.
Setting Up Your Composition
What is a composition? The use of composition is a skill in any visual art form. It ranges from painting to photography and allows you to arrange the elements in order to create a stimulating image. Artists use composition to communicate their idea or vision to the viewer. It is the building block of an image.
You've found the location for your next image. The time of day and weather conditions are perfect. But how do you set up the camera's composition to get the most from the location?
First, study the area in front of the camera. Look for interesting patterns, lines and textures. Next, find a subject within the frame and adjust the camera's angle to arrange the visual elements using the standard rules of composition, such as the rule of thirds or golden ratio composition.
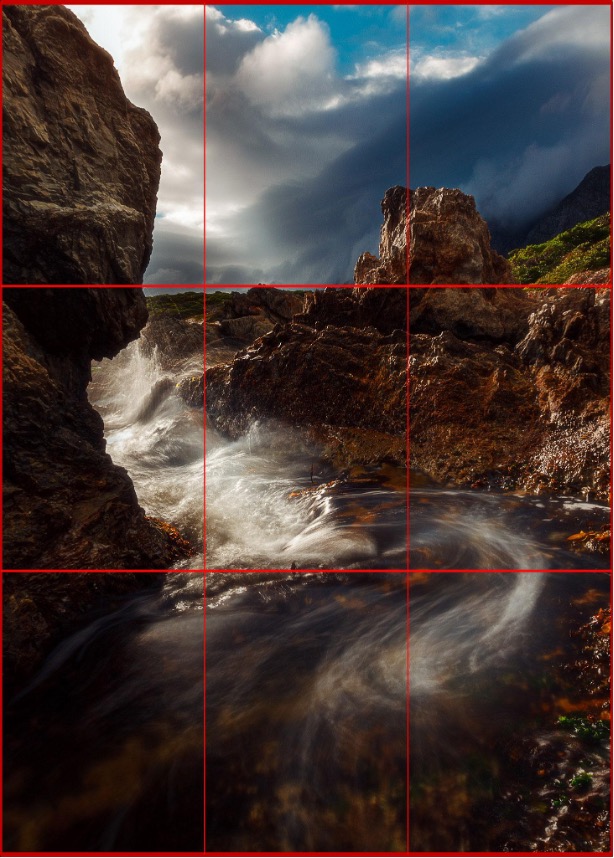
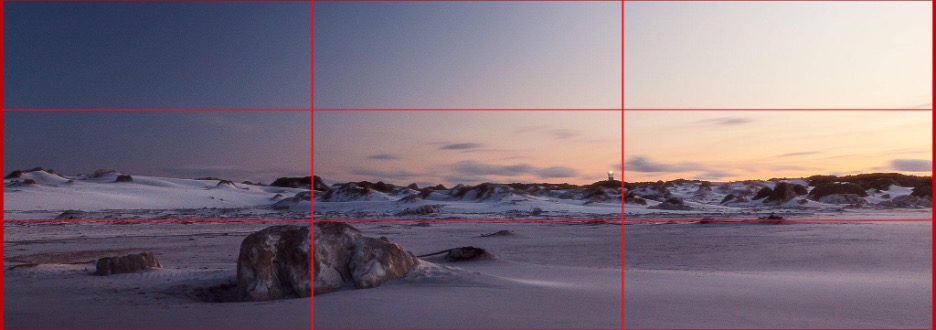
The rule of thirds applied to the image
Once you've secured your composition, it's time to decide how you'd like to photograph the image. This could be via means of short exposure, multiple exposure or long exposure. You could use additional filters to emphasise the subject or to remove distracting elements from the composition.
Let's take a look at some practical examples of different compositions and styles of landscape photography below.
Above you can see the basic rule of thirds, where the image is divided into thirds. The eye naturally moves to a subject placed on either the top or bottom intersection. It then moves toward a secondary subject (in the background), located on one of the other four intersecting points. If you follow this composition, you're already on track to get better-looking images straight out of the camera.
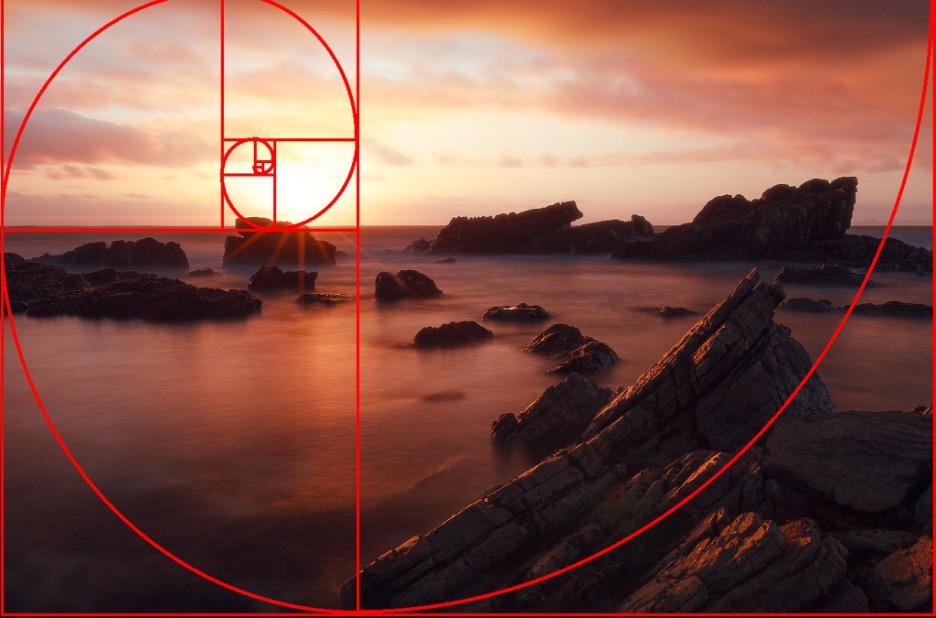
The Golden Ratio applied to the image
Another compositional tool is the Golden Spiral or Fibonacci Spiral. It uses a ratio of 1618 to 1, and it has been used in forms of art ranging from classic paintings to architecture to create proportions pleasing to the eye. The Golden Spiral is also found in nature and can apply to any ratio. Whether it's the size of an arm attached to a human body or the construction of a Nautilus Shell.
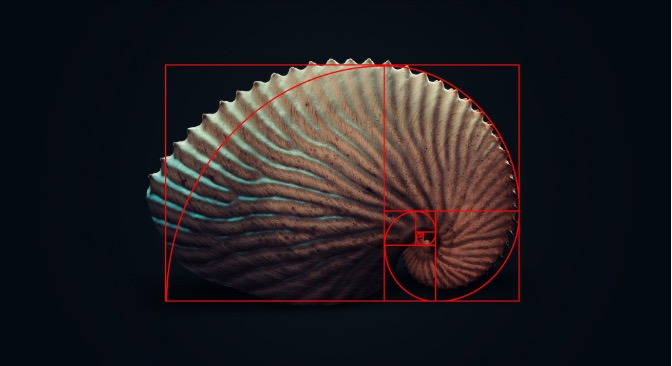
The Golden Ratio found in nature
Exposure
Now that we have the composition set, it's time to work out the other details in your camera settings. Let's start with exposure.
Exposure refers to the time the shutter stays open in front of the camera's sensor, exposing it to light. You could choose to have a short exposure time of a fraction of a second or a long exposure time of a few minutes or a few hours. Your choice will all depend on the subject matter and the type of filters you use.
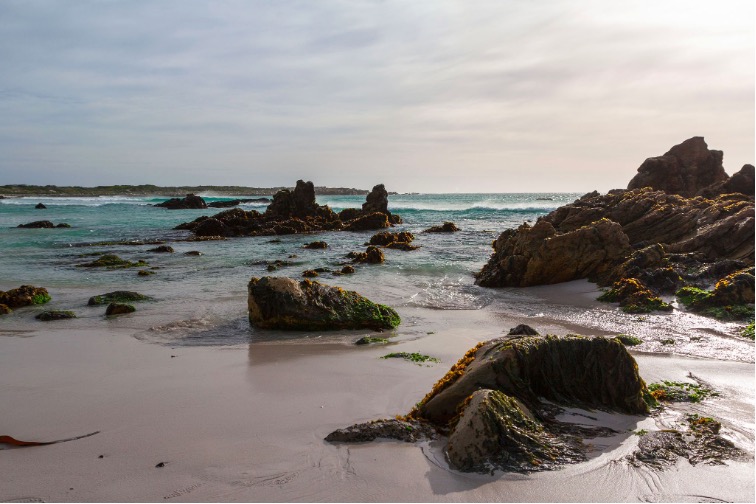
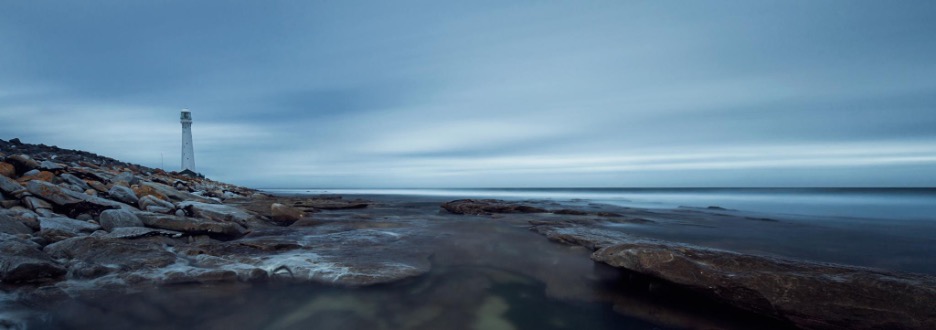
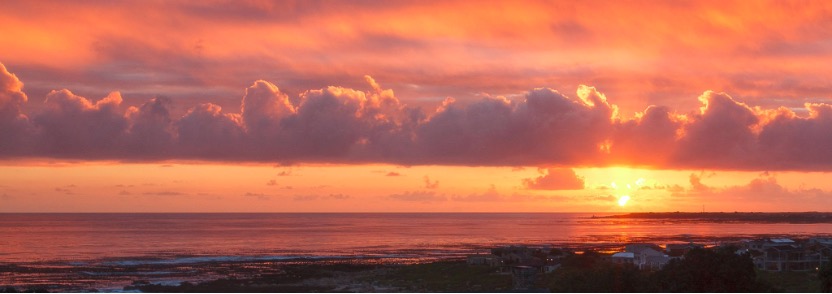
A short exposure time was used, freezing the motion of the waves
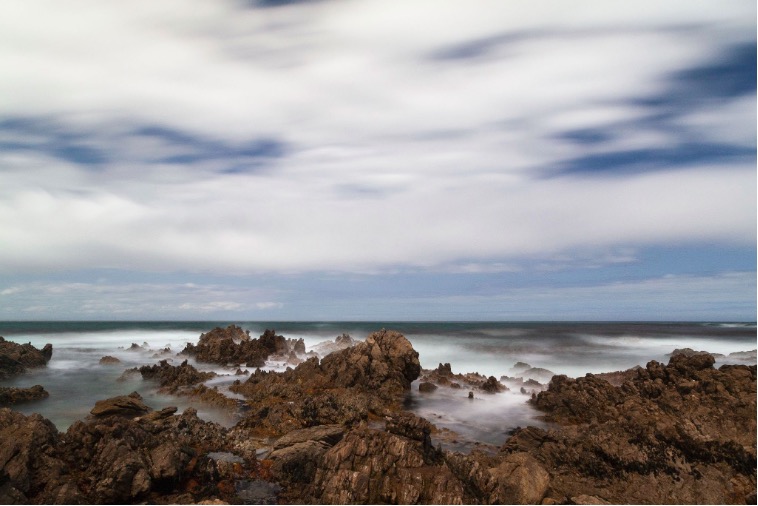
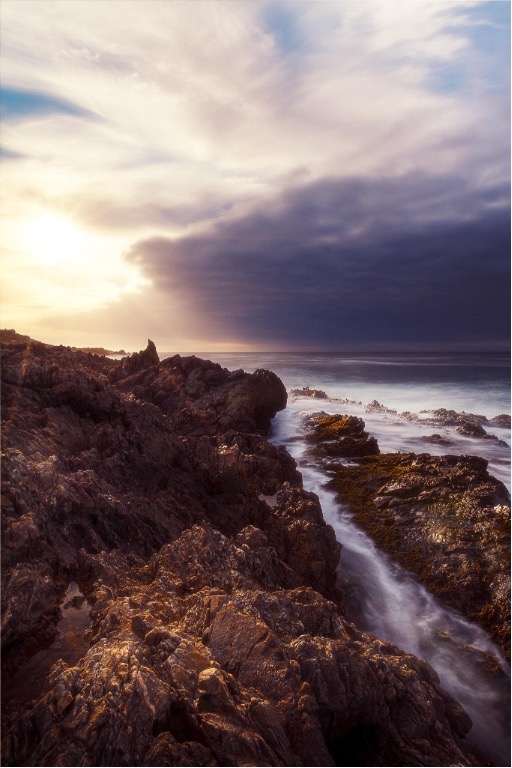
A longer exposure is used to blur the waves and clouds.
Let's say, for example, you're shooting a scene containing water, such as the ocean or a waterfall. These types of images are commonly shot using a longer exposure to emphasise the flow of water over time. A long exposure introduces motion blur on any moving subject, such as water, and can be extremely useful to aid your composition.
Using a shutter speed of around 1/500th will usually freeze any movement in the image, however, using shutter speeds of around 1/50th or below will start to introduce motion blur.
Using certain filters combined with a slow shutter speed will result in excessive motion blur and could be beneficial in showing movement or eliminating distracting subjects in your image, such as people moving across the frame.
To utilise a longer exposure (for any exposure under 1/50), the use of a tripod must be recommended to eliminate camera shake. Once the camera is mounted on a tripod the use of a cable release or remote trigger is also recommended to avoid any further camera shake.
Certain cameras, such as the Fujifilm GFX 100S enable you to use slow shutter speeds for up to 60 minutes at a time without the use of a cable release or remote trigger. The GFX 100S will also give you an accurate exposure meter reading when choosing the exposure time for the number of seconds or minutes your choose to keep the shutter open. The benefit of being able to choose the exact number of seconds or minutes is useful when planning your shoot as it eliminates the guesswork before taking the photo.
Filters
Using filters in landscape photography can be extremely handy when you are looking to achieve a certain effect, such as slow shutter speeds as mentioned earlier, or when you wish to tone down the brightness of an overpowering sky. With advanced filter systems such as the Lee 100 Long Exposure Kit, multiple filters can be stacked to achieve these effects in a single image.
Polarising Filters
Polarisers are used to eliminate reflections and to darken a blue sky. These filters also add a degree of contrast and increase your exposure time by a few stops. It's one of the most common filters used in landscape photography and adds instant, eye-catching results to your images. Polarisers are most effective when facing 90 degrees away from the sun, and are ineffective when facing the sun or when you have your back to the sun.
A circular Polariser was used to add contrast and darken the sky on the left.
Neutral Density Filters
Neutral density filters are handy when trying to control the brightness of an image. They are often used in film production to allow the user to use larger apertures for shallow depth of field, however, their use in photography has become more common as they allow you to have the shutter open for longer, resulting in motion blur.
Graduated Filters
Graduated filters are filters that have half of their filter darkened, while the remaining half is clear. This allows you to darken a bright sky while keeping the exposure of the foreground the same. Graduated filters are available as hard-graduated or soft-graduated. Hard grads have an immediate separation between the clear glass and darkened area, while soft grads have a gradual separation between the darkened and clear areas of the filter.
A soft graduated filter was used to bring down the exposure of the sky, showing the partial solar eclipse as the sun sets over the ocean
If you do not own any filters yet, there are ways and means of finding the correct exposure for both sky and foreground, however, this would involve the use of multiple exposures being taken and combined using software, such as Adobe Photoshop.
The Photograph
Landscape photography is a genre that tests your patience and resilience. It's a challenging form of photography where sometimes you walk away with several good images. Sometimes you walk away with none. No matter what you do, keep trying and experimenting with different techniques. Most importantly, enjoy the process. It's always worth it in the end.
Read next
- Fujifilm GFX 50S II Review | A Landscape Photographers Dream
- Autumn Landscapes: 5 tips for shooting autumn colour
- Spectacular Landscapes with Light & Land Photography
Thank you!
Thanks for taking the time to read our blog, we really do hope they help you out and answer some of your questions. If you still have some unanswered, then please feel free to get in touch with our team of experts.
We have a LiveChat option on our website and we can, of course, be contacted via our email, we're also on the end of the phone too! Read more on how to contact us here >
Want to write for us?
If you've got experience with producing content on photo, video and/or optics products or techniques then we would love to hear from you. Contact our blog editor, Bea, with a sample of your work at [email protected].
- By Fred van Leeuwen
- 11 Nov 2022


