


Beginners Guide to Architecture Photography
When I first began my journey into photography some twenty one years ago, I was convinced I would not make the same mistakes as I had made as a musician. Instead of specialising, I was keen to set out and explore every genre of this new photographic art form.
Although I began this adventure in the landscape, it wasn't to long before my lenses were trained on the built environment. Unlike many of the landscape purists, I wanted buildings in my pictures. I wanted to enhance my photography with a human element. I can tell you now it wasn't very long before Landscape was parked on the backbench and seeking out the most incredible building designs that the world had to offer.
All architectural photos in this blog were taken by David Clapp.
Architectural photography is a captivating genre that (if you let it) will inspire you beyond anything you have created before. You may already have the tools you need to begin to capture the beauty, grandeur, and intricacies of buildings and structures. With the advancement of Canon's RF cameras and a combination of new and legacy lenses, there has never been a better time to start.
In this article, we will delve into the techniques and tips that can help you get started, elevate your architectural photography game and iron out some of the more complex technical questions. From capturing captivating compositions to effectively managing perspective distortion and tilt shift lenses, we'll cover it all. Let's get bending reality and unlock the techniques to capturing architectural marvels, both in the UK and abroad, with precision and artistic flair.
Starting Out and Equipment
Embarking on your building photography journey doesn't necessarily require an extensive collection of high-end equipment. It can be as simple as owning a wide-angle lens and some software, so do not be put off by the tech. You can still capture compelling architectural images even with basic Canon photography gear.
Here’s a list of basic equipment and focal lengths that you will need -
- Canon Body, (EF or RF, either crop sensor or full frame doesn’t matter)
- Wide angle lens (16-35mm or equivalent) - perfect for interiors / ceilings / dynamic exterior shots
- Medium Zoom (24-70mm or equivalent) - exteriors and interiors, a sense of place
- Longer Zoom (anything between 70mm and 400mm) - long-distance exteriors and interiors as well as details.
More specialised architectural glass starts with the remarkable Canon tilt-shift range. For now, the entire TSE range is only available the older EF mount (using an adapter), but this will change in the future.
Your RF choice could include the RF15-35mm, RF24-105, RF100-400, RF100-500
Speciality Lenses: (see below for how these remarkable tilt-shift lenses work)
- Canon EF TSE 24mm f3.5L mk2 - the ‘goto lens’ for architectural perspective correction
- Canon EF TSE 17mm f4L - perfect for perspective control of interiors / exteriors and tight spaces
- Canon EF 8-15mm Fisheye - twist reality with this unique optic, that can see almost 180º
Canon’s longer TSE focal lengths (like 50mm, 90mm and 135mm) are designed for more specialist purposes like product photography / dentistry / jewellery and although they can be used for architecture, we will omit these in this article.
I am certain you are already thinking that you have a lot of this already covered, so let us look at what to shoot.
Subjects
The beauty of architectural photography (in comparison to a quality landscape) is that potential subjects are literally all around you. One of the perfect places for this adventure to begin is at the humble country church, but let’s explore some possibilities and UK locations that could be near you -
Historic UK Landmarks:
The UK is renowned for its rich history and iconic landmarks. Cities like London, Edinburgh, Bath, and York are home to architectural gems such as Parliament, Tower Bridge, Edinburgh Castle, Bath Abbey, and York Minster. These structures provide excellent opportunities to capture the grandeur of historical architecture.
Castles and Palaces:
The UK boasts numerous castles and palaces, each with its own unique charm. Windsor Castle, Hampton Court Palace, Stirling Castle, and Cardiff Castle are just a few quality examples. These structures offer a blend of historical significance and architectural beauty. Personal northern favourites are Bamburgh Castle, Dunstanburgh and Conwy Castle. Although perfect in the landscape, castles often display intricate details perfect for the long lens.
Cathedrals and Churches:
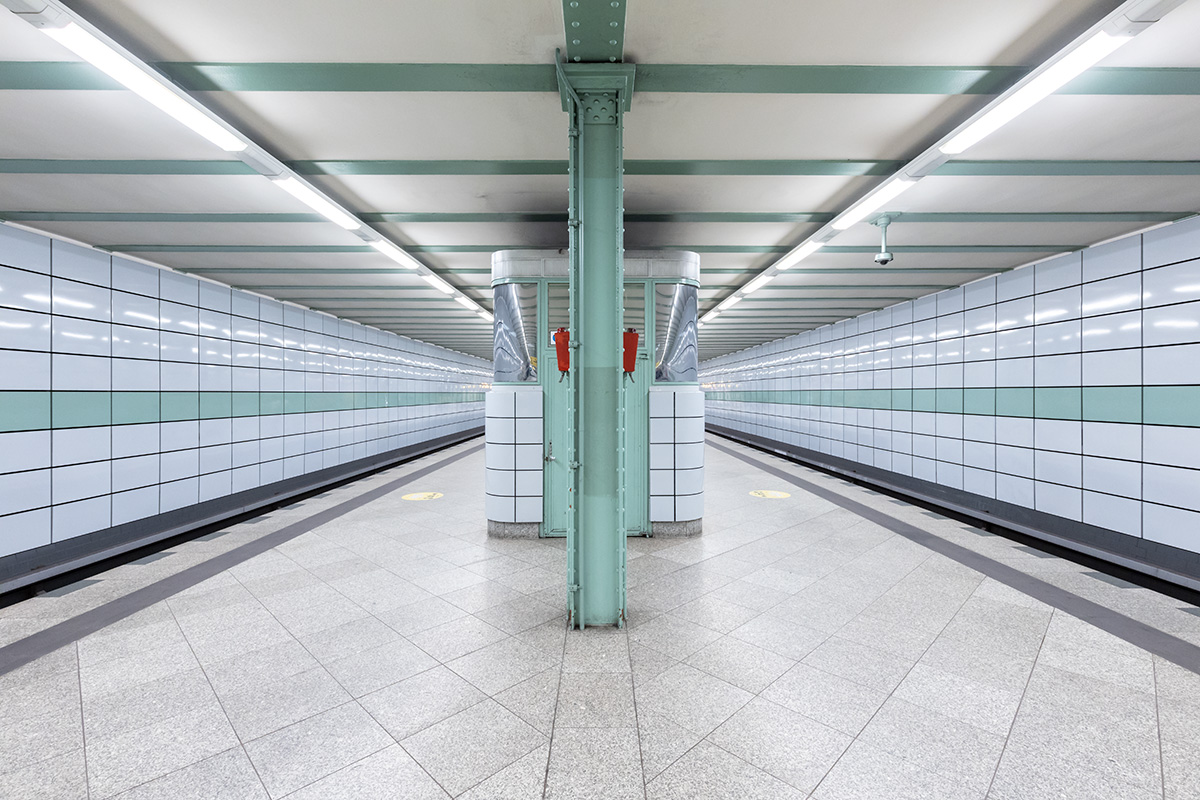
This country is dotted with magnificent cathedrals and churches, from the lowly village church to grand cathedrals. Salisbury Cathedral, Durham Cathedral, the Liverpool Cathedrals, and St. Paul's Cathedral are notable photographic examples. These structures often feature intricate stained glass windows, soaring arches, and ornate facades to play with. They are also a hotbed for practicing symmetrical alignment and stretching ceilings with wide-angle lenses.
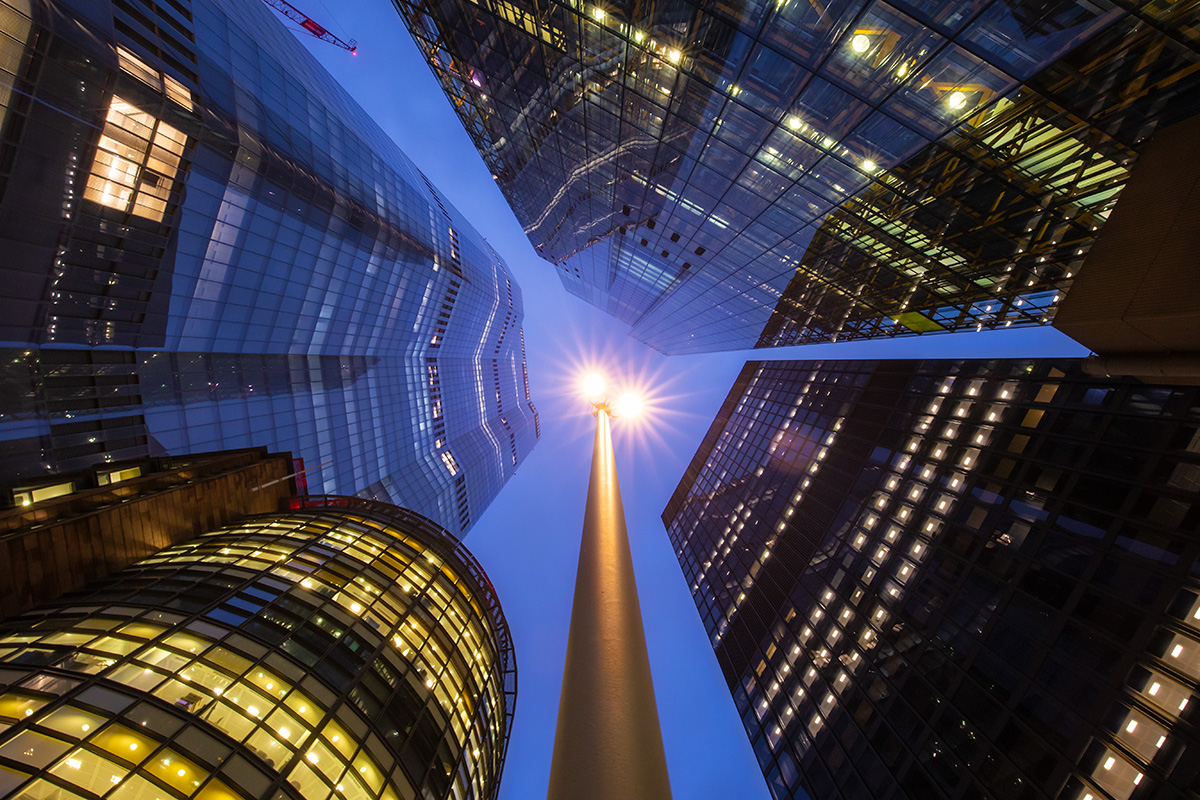
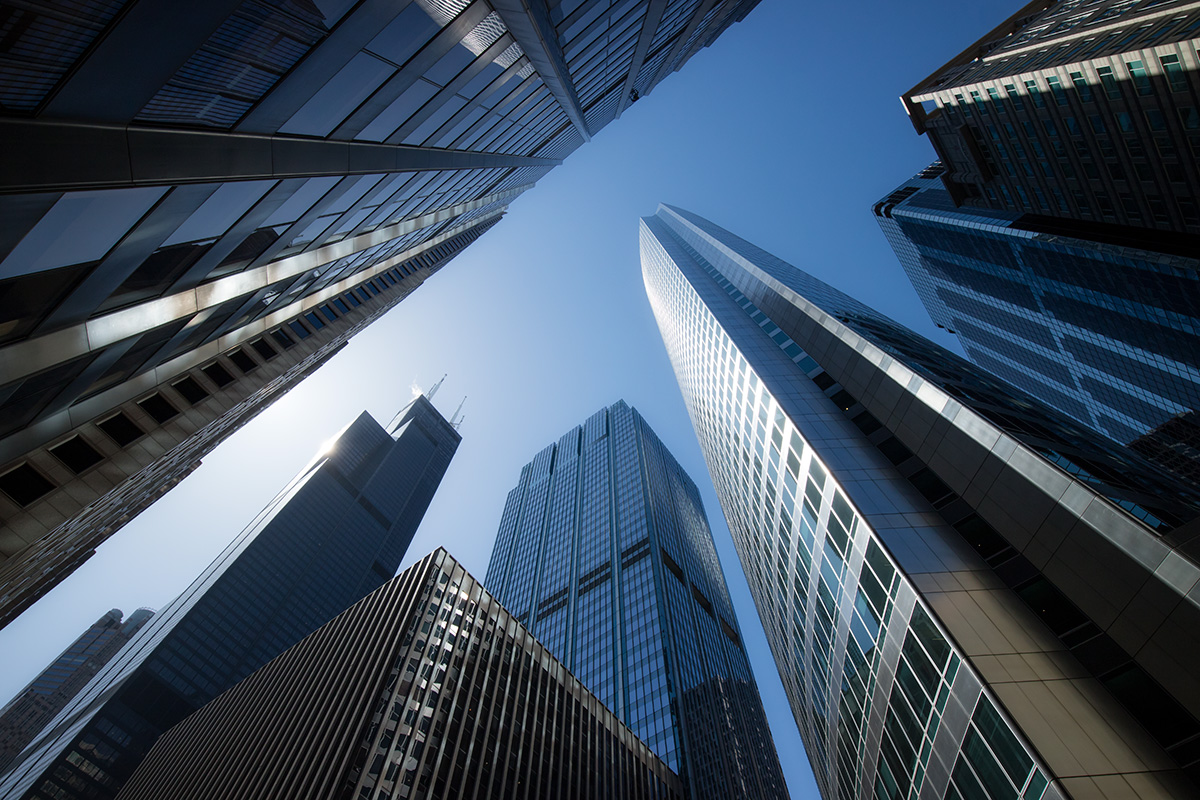
Modern Architecture:
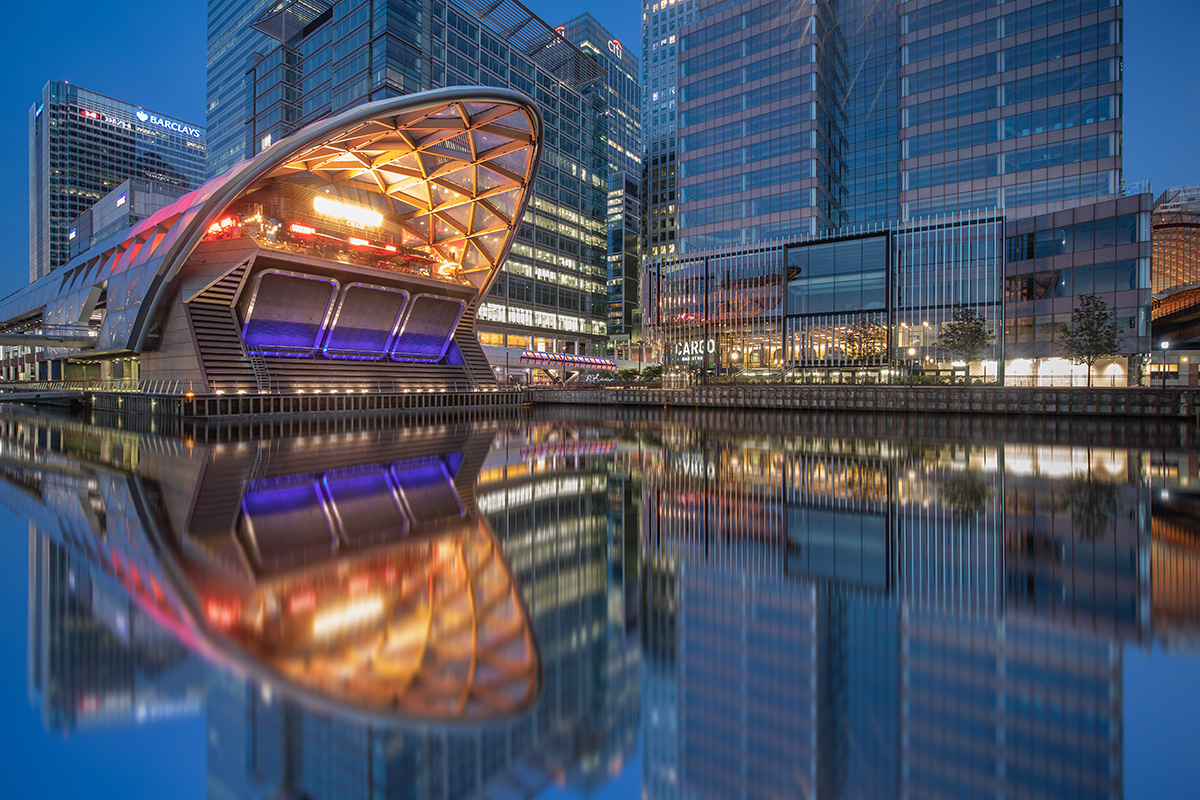
In addition to its historic charm, the UK also embraces modern architecture. Cities like London, Manchester, Glasgow, and Birmingham showcase contemporary architectural marvels. London alone contains some spectacular opportunities - The Shard, The Gherkin (all of Bishopsgate). Further north The Scottish Parliament, The Library of Birmingham are just a few examples of striking modern structures that can inspire the beginner architectural photographer. Even industrial subjects like the beautiful Falkirk Wheel can make superb photography.
Urban Landscapes:
The bustling cityscapes of Liverpool, London and Newcastle, and other major cities should be explored for their gritty urban potential. Explore areas like Canary Wharf, the South Bank, and the financial districts to capture the vibrancy of these locations.
Residential Areas:
Don't overlook the charm of residential architecture in the UK. In my early days, I built a collection of quaint thatched cottages. Georgian townhouses and Victorian terraces can be easily found in various towns and villages. Places like the Cotswolds, Bath, and Edinburgh's New Town offer picturesque settings with an architectural beauty that can be appreciated and captured by beginner photographers. Lower Slaughter is a fabulous example of historical residency in a landscape setting.
Camera Technique
Although a tripod seems like it should be an essential addition, I would recommend shooting handheld unless the light levels are low, or you break out a tilt shift lens. Do not be afraid of higher ISOs these days. The new range of RF cameras all have super control of noise. These are the keys to untethered creative freedom.
Set the Camera Mode to Manual (M):
Switching to manual mode gives you complete control over your camera settings. This allows you to adjust the aperture, shutter speed, and ISO to achieve the desired exposure and creative effects. It also stops the camera from miscalculating exposure as these places often exhibit complex lighting.
Set the ISO:
ISO determines the camera's sensitivity to light. For architectural photography, aim to keep the ISO as low as possible (e.g., ISO 100 or 200) to minimise noise and maintain image quality.
Choose an Aperture:
Aperture controls the depth of field, which determines how much of the scene appears in focus. In architectural photography, it is often desirable to have a large depth of field to capture sharp details throughout the image. Set your aperture to a higher value (e.g., f/8 or higher) to achieve this. If this is not possible, don't worry. You will be surprised how much depth of field a wide-angle lens has when shot wide open. I often shoot wider apertures positioning myself away from close features.
Adjust the Shutter Speed:
Shutter speed determines how long the camera's sensor is exposed to light. In architectural photography, rather than trying to illuminate everything, set a shutter speed that suits the lighting conditions while maintaining image sharpness. Low key images where the subject appears from the dark, work very well for moody interiors.
Enable Grid Lines:
Enabling grid lines on your camera's viewfinder display can help you maintain straight lines and achieve balanced compositions. The grid lines are found in the camera's settings menu under the display or viewfinder options. I recommend using the 6x4 grid over the 3x3, as this gives a centre line both horizontally and vertically.
Use Live View:
Utilise the Live View feature (if you're not using a mirrorless system) to compose and preview your shots. It can be particularly helpful for aligning vertical lines and ensuring a level horizon. Review and reflect - shoot and then judge and think to yourself - ‘how do I make this better?’ Remember, this is a slow process - you are in this for the long haul!
Consider Bracketing:
To capture a wider dynamic range, bracketing can be useful in architectural photography. Set your camera to automatically take a series of exposures at different brightness levels. This technique can help you capture details in both highlights and shadows, allowing for greater flexibility in post-processing.
Getting an Emotional Connection
When approaching an architectural subject, try to establish an emotional connection with the architecture itself. As a form of artistic expression, you can evoke various emotions with composition and camera positioning. Elicit a sense of awe, wonder, serenity, or even nostalgia. It takes time to ‘see’, but after some successes, you will build a formula.
Research and Context:
Before photographing a particular architectural subject, spend some time online and delve into its history and significance. Understand the story behind the structure, its cultural or historical relevance and the emotions it may evoke for those who encounter it. This knowledge will inform your approach and enable you to capture the essence of the architecture more effectively. I often find that looking at paintings of a historical subject can work very well before I visit.
Observation and Interpretation:
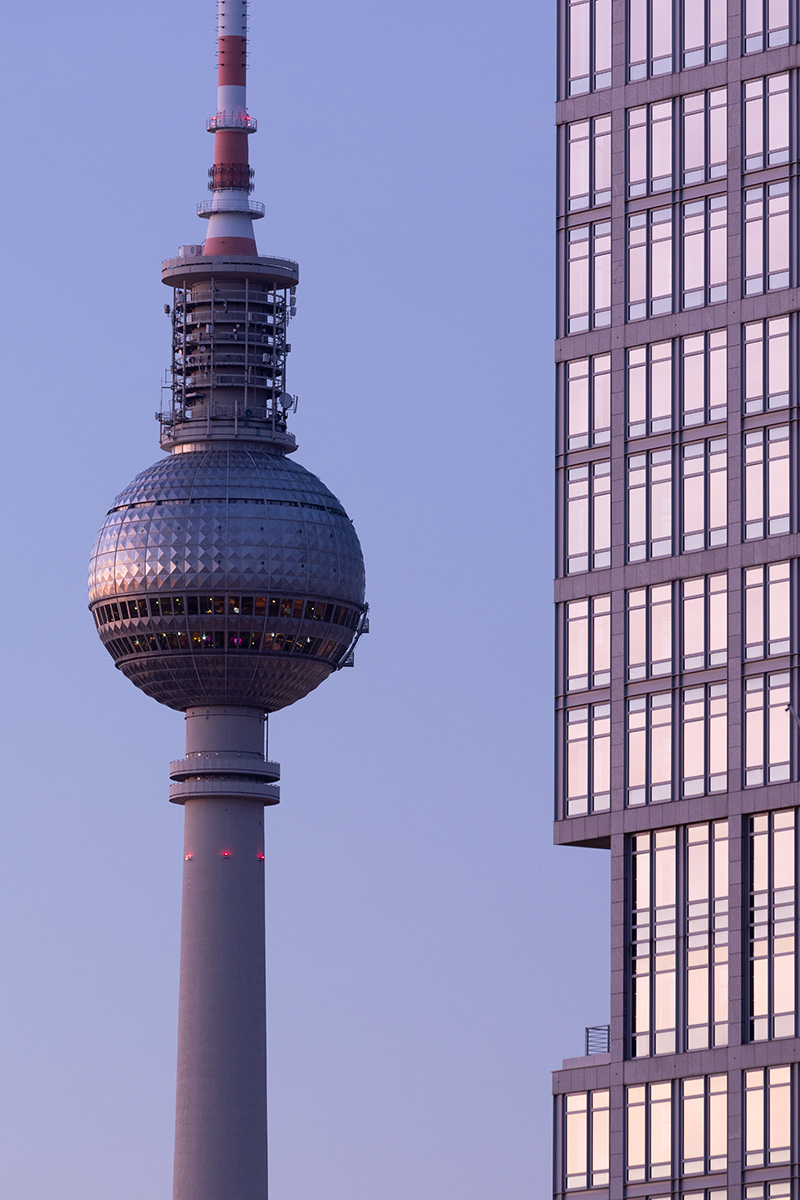
Observe the architectural subject closely - you will need a lot of time to connect. Pay attention to its form, lines, textures, and the play of light and shadow. Consider how these elements interact to create a specific atmosphere or mood. Look for details that can evoke emotions, such as the intricate craftsmanship of a historic building or the clean lines and minimalist design of a modern structure.
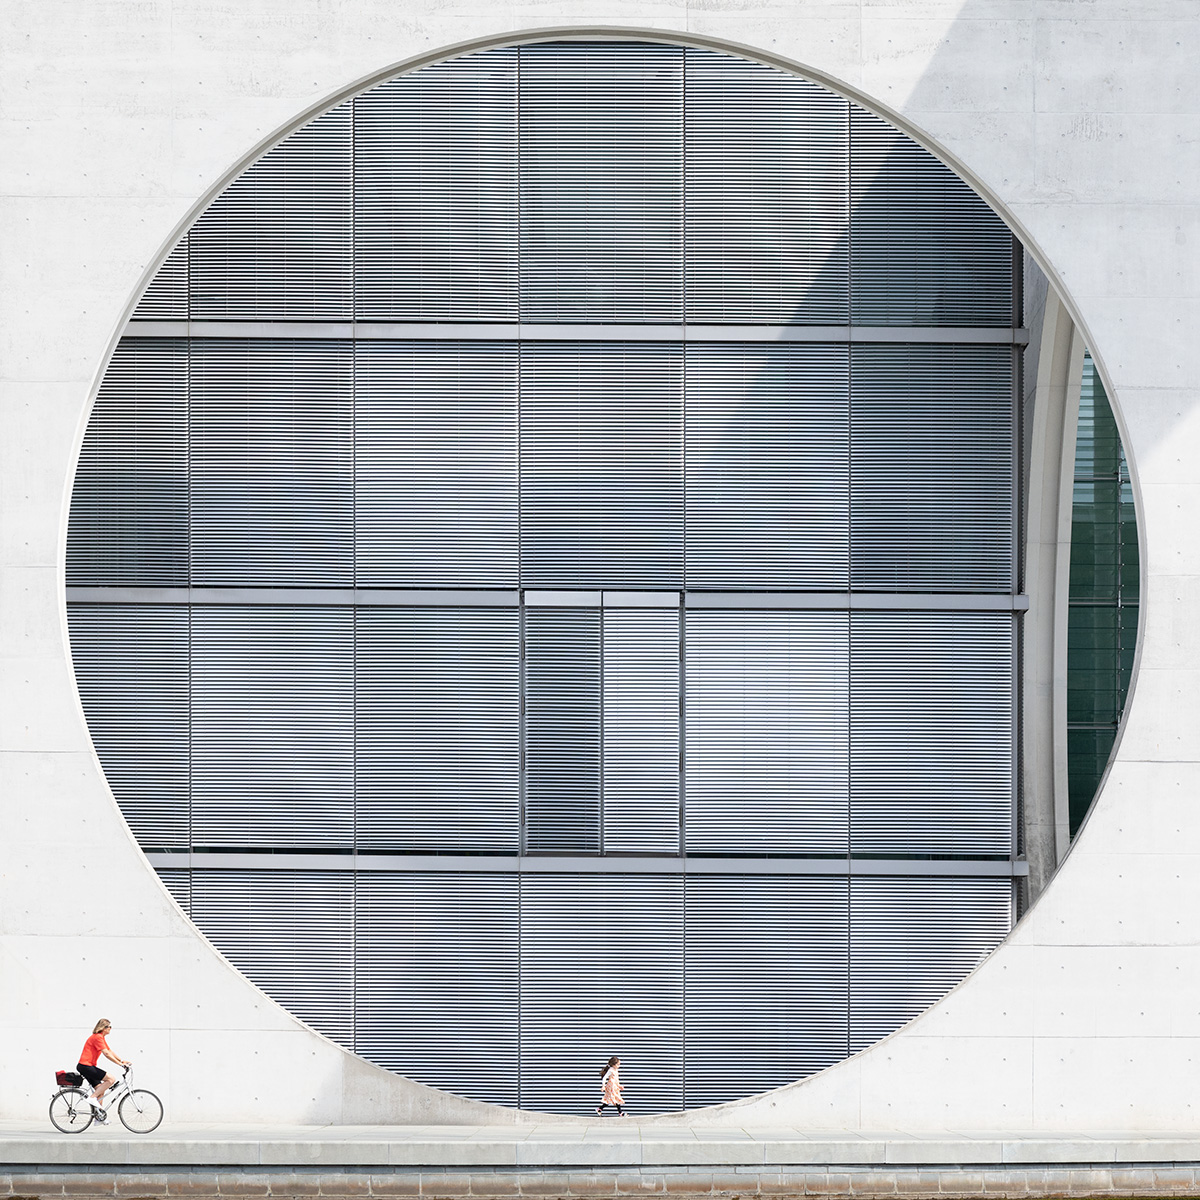
Composition and Framing:
Compose your shots thoughtfully to emphasise the emotional aspects of the architecture. Use techniques such as leading lines, symmetry, and framing to draw the viewer's eye and create a visual narrative or gripping dynamics. Consider the placement of elements within the frame to evoke a particular emotional response. For example, a low-angle shot may convey a sense of power and grandeur, while a close-up of details may evoke intimacy or curiosity.
Lighting and Atmosphere:
The quality of light can greatly influence the emotional impact of architectural photography. Pay attention to the time of day, weather conditions, and the interplay of light and shadows. Soft, warm light during the golden hour can create a sense of tranquillity, while dramatic light and shadows can add depth and evoke a sense of mystery or drama. Adapt your shooting schedule to capture the desired lighting conditions that align with the emotions you wish to convey.
Post-Processing:
The post-processing stage provides an opportunity to enhance the emotional impact of your images. Experiment with different colour grading techniques, contrast adjustments, and tonal adjustments to evoke specific moods. However, ensure that your post-processing choices remain authentic to the architectural subject and do not overly manipulate the image.
Remember that emotions are subjective and can vary from person to person. As a photographer, your goal is to capture the essence of the architectural subject in a way that evokes emotions and invites viewers to connect with the image. Through careful observation, composition, lighting, and post-processing choices, you can create photographs that go beyond mere documentation, evoking a genuine emotional response in your audience.
Finally…
This is a long-haul process that requires patience and practice. The main thing is to think symmetry, shoot across your subject at 45º, vertically upwards and then really delve into the details with a long lens. This could mean you come away with far too many images, but the beauty of this is having a lot of choice when sat at home with the computer and a cup of tea. I have found over the years that lighting is absolutely critical - here are some final tips:
Weather:
Visit church and cathedral interiors on light overcast days. This will avoid specular highlights and excessive bright patches.
Low Light:
Although golden hour is also perfect for lighting exteriors, stay until you can shoot no more! Where the sky is clear or cloudy, an illuminated building will sit beautifully against any ‘blue hour’ background. If you start to see browny-orange clouds (from light pollution) it's time to pack up.
People:
Add a sense of scale and use people to your advantage. Every quality architectural drawing contains people to show the size of the building - do the same with your photography.
The Law:
Don't be put off by this. You are free to shoot architecture in a public place, from pavements and open spaces as long as you are not on private property. If you are approached then be respectful, explain you were not aware, pack up and leave. The South Bank in Central London (for example) is off limits to your tripod, so don't attract attention - leave it at home and enjoy your camera as though you are a tourist.
Always ask permission inside building interiors before taking pictures. Many modern architectural subjects are managed by security companies who will not take a ‘shoot now ask later’ approach very well, but asking politely or even applying for permission is often all it takes. Know your photographic law.
Tilt Shift Lenses
What's all the buzz regarding tilt shift lenses? Most photographers have heard of them but understanding how they work is a bit confusing.
The tilt-shift lens allows you to manipulate the perspective of your image. It has a very large image circle and the photographer can reposition this without moving the camera. In traditional lenses, when you point your camera up to capture a tall building, the vertical lines appear to converge, creating a distortion known as keystoning. With a tilt-shift lens, you can adjust the tilt mechanism to keep the lines parallel and maintain a more accurate representation of the building's geometry.
Shift Function:
The shift function of a tilt-shift lens allows you to shift the lens parallel to the camera's image sensor or film plane. Shifting the lens helps to correct perspective distortion and eliminate the keystone effect when photographing tall buildings or architectural structures. It enables you to maintain vertical lines straight without the need for extensive post-processing adjustments.
Tilt Function:
Although this is rarely used by the architectural photographer, the tilt function of a tilt-shift lens refers to the ability to tilt the lens relative to the camera's image sensor or film plane. By tilting the lens, you can change the plane of focus, creating a selective focus effect. This technique is particularly useful for achieving a larger depth of field than what is typically possible with regular lenses.
With the addition of the pan and tilt viewfinder information, I often use the 24mm TSE mk2 by hand. When starting out I suggest using a tripod as precise adjustments are crucial. This also helps you to take your time when composing your shots, paying attention to the lines, angles, and details within the frame. With practice, a tilt-shift lens can become a valuable tool in your architectural photography toolkit, allowing you to achieve unique and visually captivating results. In fact, I used mine so much I wore out the shift mechanism and had to get Canon to replace it entirely!
Read next
- Architecture Photography with the DJI Mini 3 Pro
- Architecture Photography with the Tamron 17-70mm f2.8
- The Canon R10 a Budget Wildlife Photography Powerhouse
Thank you!
Thanks for taking the time to read our blog, we really do hope they help you out and answer some of your questions. If you still have some unanswered, then please feel free to get in touch with our team of experts.
We have a LiveChat option on our website and we can, of course, be contacted via our email, we're also on the end of the phone too! Read more on how to contact us here >
Want to write for us?
If you've got experience with producing content on photo, video and/or optics products or techniques then we would love to hear from you. Contact our blog editor, Bea, with a sample of your work at [email protected].
- By David Clapp
- 14 Jul 2023


